Home Assistant Remote Access using NGINX
In this guide we will set up Remote Access using NGINX. A video guide can be found at the following link:
NGINX is used as a reverse proxy, protecting traffic over a secure SSL connection. You can use it with any dynamic DNS provider, we’re using DuckDNS to keep things simple. You’ll need access to your router configuration page to set up port forwarding. This method doesn’t affect local access over http so you can still access Home Assistant as normal.
First we need to create a domain in DuckDNS.
To do this, visit DuckDNS.org and create an account or login. We already have an account so we’ll move to creating the domain.
In the domains section, enter the subdomain you wish to create.
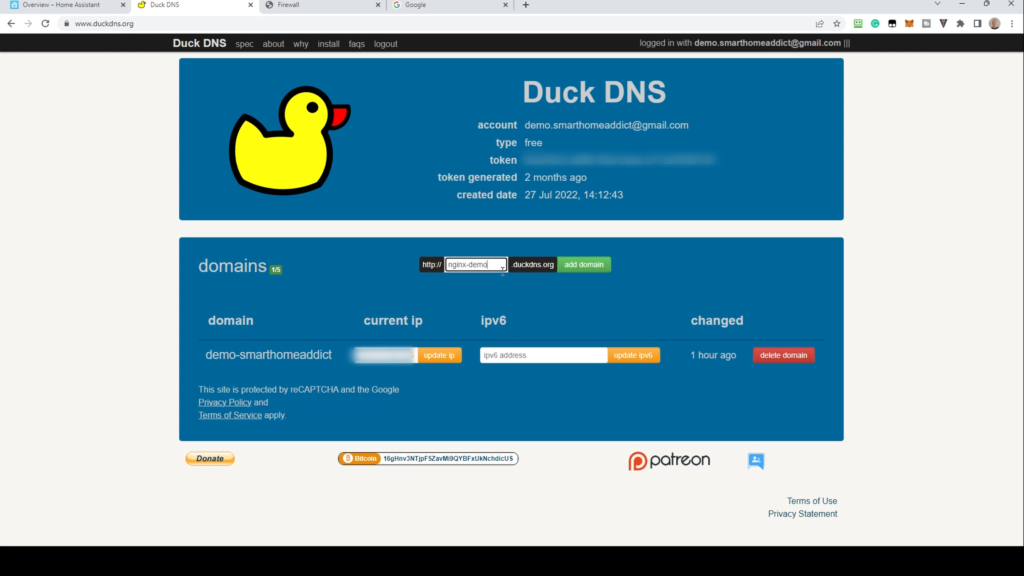
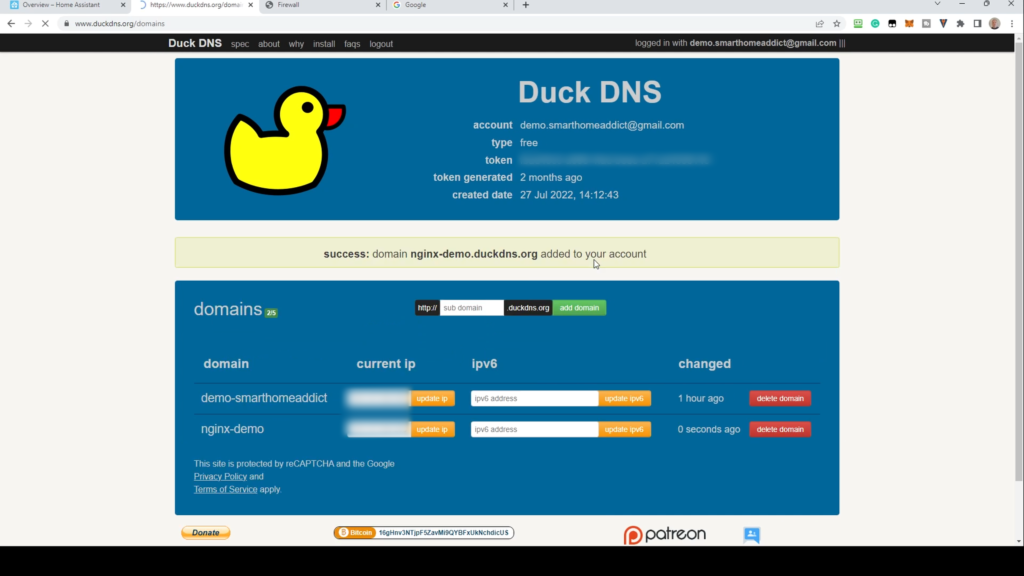
Click Add Domain. This will create a domain name of subdomain.duckdns.org. Once you get a message to confirm, make a note of the subdomain you created, and copy the token from the top part of the screen. This should be secret, so treat it like a password. We’ve blurred it here.
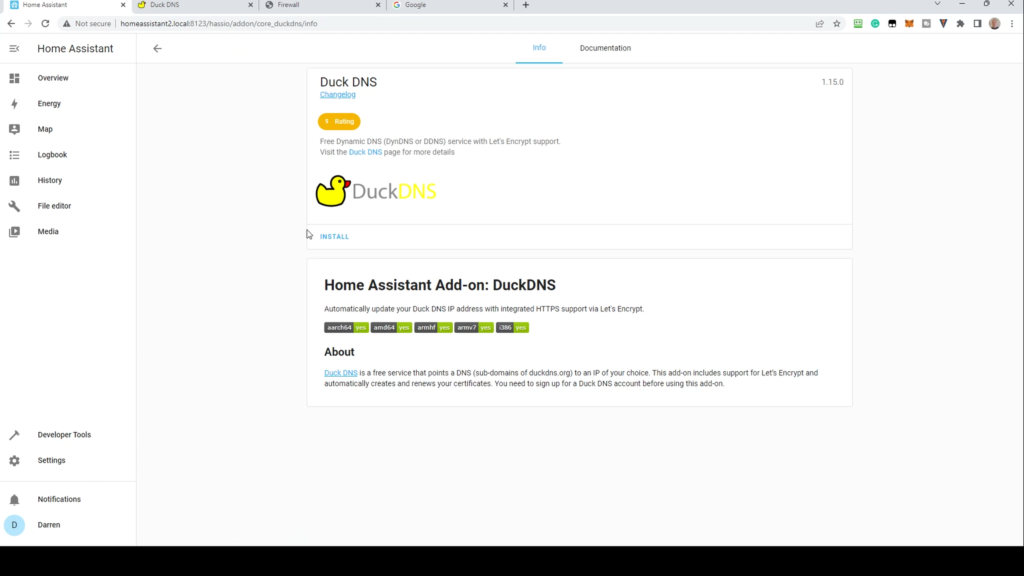
Go back to Home Assistant and Click Settings, then Addons. Click the Addon store. Then click on Duck DNS. Click Install.
When it’s installed, go to the configuration tab. Click the x within the blank domain, then add the full duckdns domain in the Domains field. Next paste the DuckDNS token in the Token field. Finally, to ensure LetsEncrypt can create an SSL certificate, go to the Lets Encrypt section and change accept terms to true.
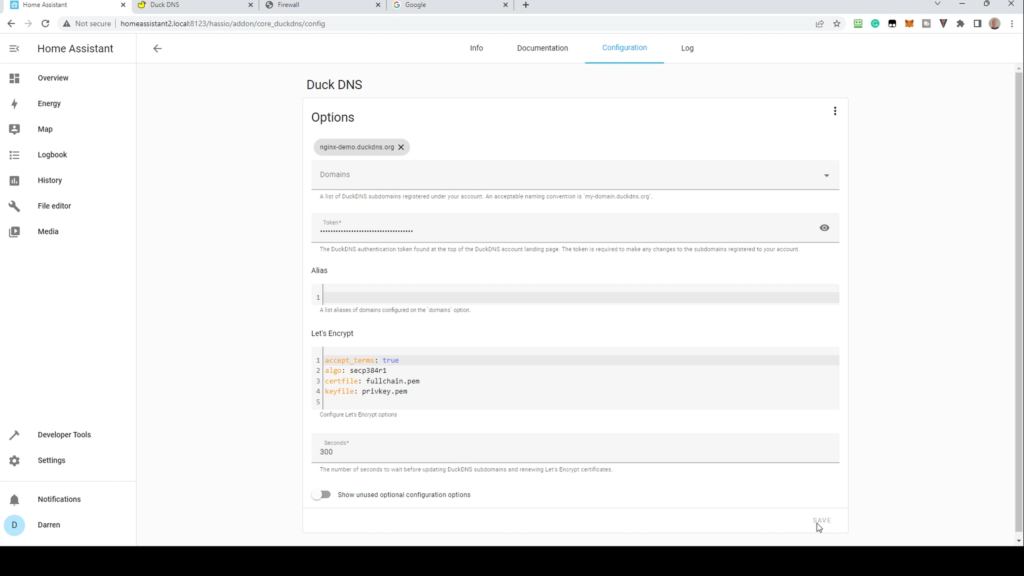
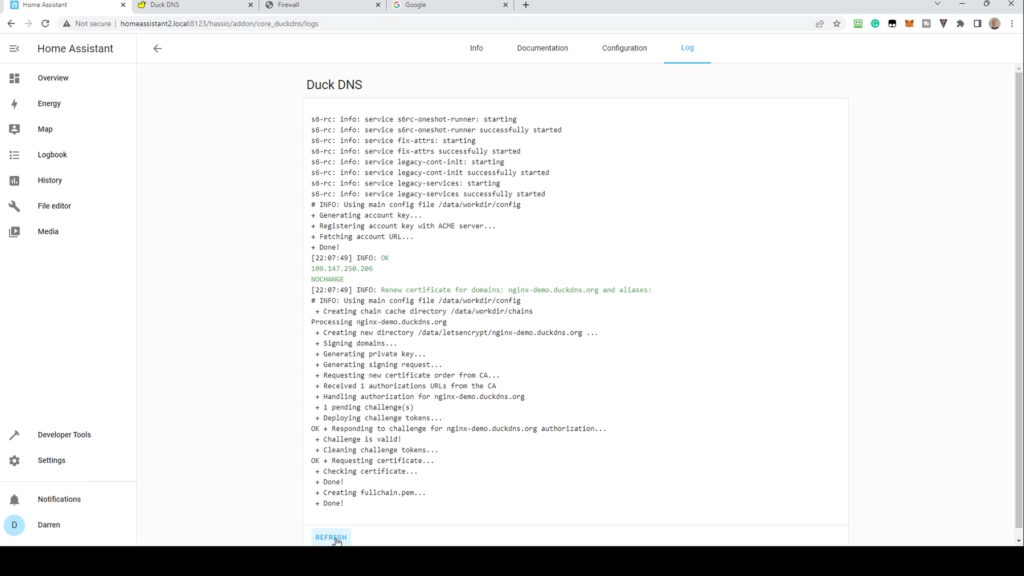
Once complete, click Save. Go to the info tab and enable the watchdog, and if you prefer, auto update. Click Start. After a few seconds, go to the Log tab. Click Refresh until the certificate process is complete.
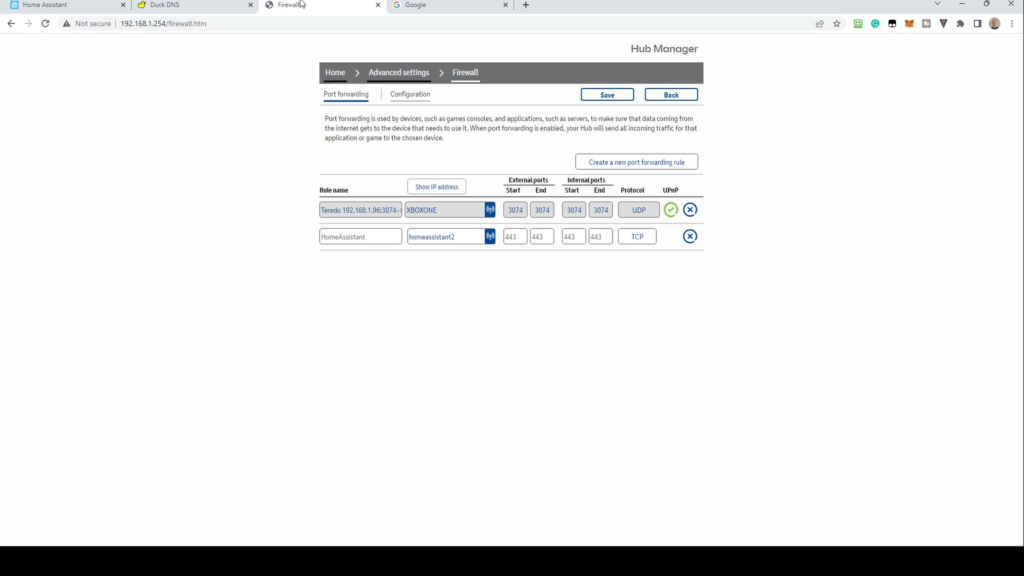
Forwarding ports on your router depends on your router make and model so you may need to Google this. However, what you’re looking to do is map the external port 443 to the internal port 443, using the TCP protocol. If you prefer using another port, use this instead.
To install the NGINX addon, from Home Assistant Click Settings, then Addons. Click the Addon store. Then click on NGINX Home Assistant SSL proxy. Click Install.

Once installed, click on the Watchdog and if you prefer, auto update. Go to the configuration tab. In domain, enter your full duckdns domain. In the Customize section, change active to true.
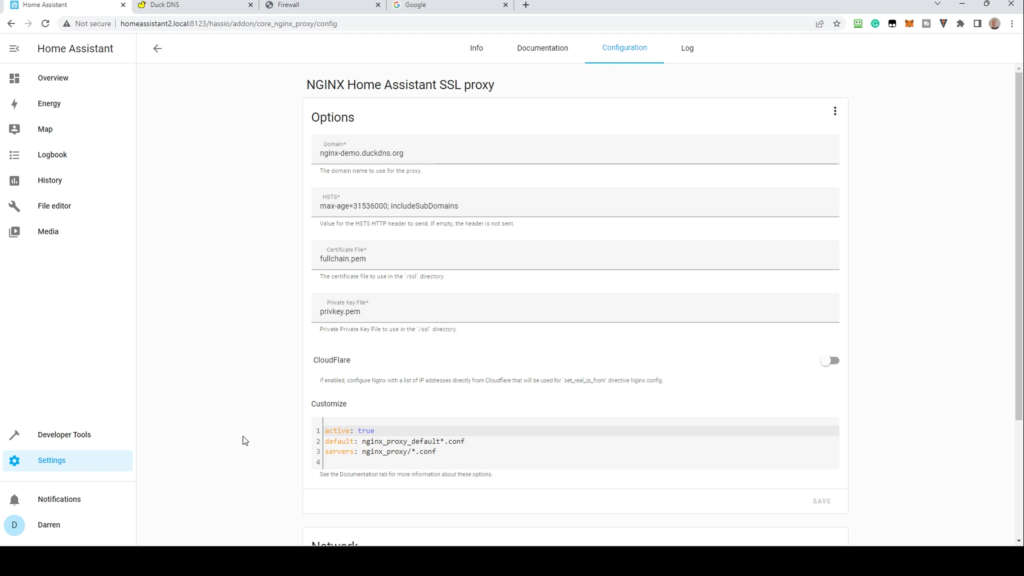
Click Save. Scroll down and if your port isn’t 443, change it here and click Save. Go back to the info tab and Click Start. Then go to the Log tab. Refresh until you see Running NGINX.

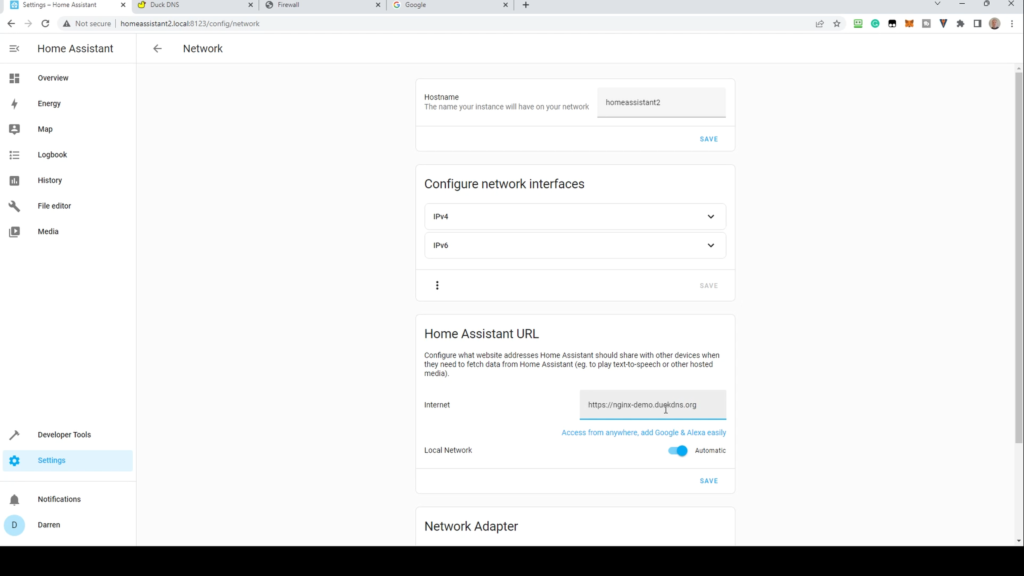
There are some settings we need to change in Home Assistant. From the Settings Menu, click System, then Network. In the Home Assistant URL section, add your domain to Internet, adding the port if not 443, then click Save.
Go to your File Editor of choice and open configuration.yaml. Enter the following lines:
http:
 use_x_forwarded_for: true
 trusted_proxies:
 - 172.30.33.0/24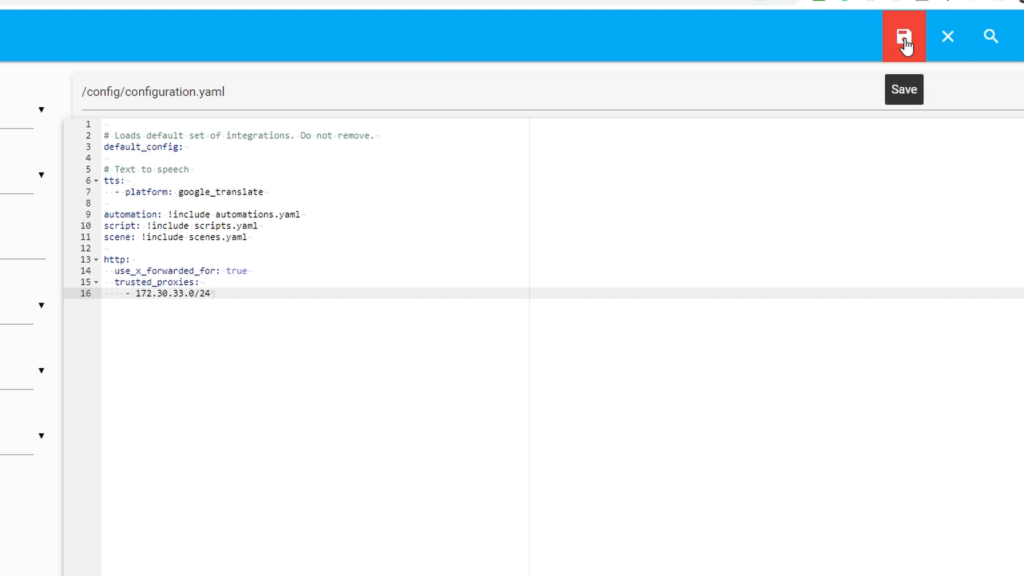
Once entered, click the Save icon. Click Developer Tools, then Check Configuration. If all is well, click Restart, then confirm.
For any addons with embedded web servers, such as ESPHome, you will need to add an extra configuration file to ensure this can be viewed remotely. This is an optional step. Navigate to the ‘share’ directory. If you can’t navigate, in File Editor, disable enforce_basepath in the File Editor configuration. Once there, click to add a new file. Create a file called nginx_proxy_default_fix_ingress.conf and paste the following in:
location /api {
    proxy_connect_timeout 60;
    proxy_read_timeout 60;
    proxy_send_timeout 60;
    proxy_intercept_errors off;
    proxy_http_version 1.1;
    proxy_set_header Upgrade $http_upgrade;
    proxy_set_header Connection $connection_upgrade;
    proxy_set_header Host $host:8126;
    proxy_set_header X-Real-IP $remote_addr;
    proxy_set_header X-Forwarded-For $proxy_add_x_forwarded_for;
    proxy_set_header X-Forwarded-Proto $scheme;
    proxy_pass <http://homeassistant.local.hass.io:8123/api>;
}
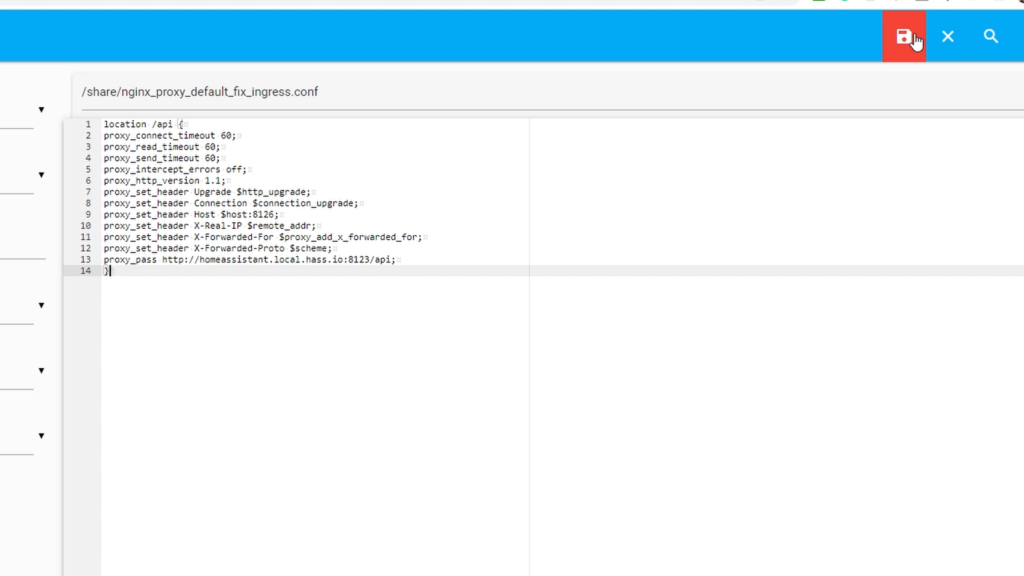
Click the Save icon. Go back to the NGINX addon and restart it.
Test by browsing to your new domain, adding the port if it’s not 443. You’ll be prompted to log into Home Assistant. Once logged in, you’ll note the padlock icon shows. Click on the domain and change to http from https. When you press enter, you’ll see this change back to https. You can also continue to browse from a local connection without issue.
An optional step is to enable IP Ban, by editing the configuration.yaml and adding a couple of lines. This will block an IP address from attempting to log in if an attacker gets a certain number of login attempts wrong, in this case 3. It’s recommended as you’re exposing your Home Assistant instance to the Internet, and this will provide some protection.
  ip_ban_enabled: true
  login_attempts_threshold: 3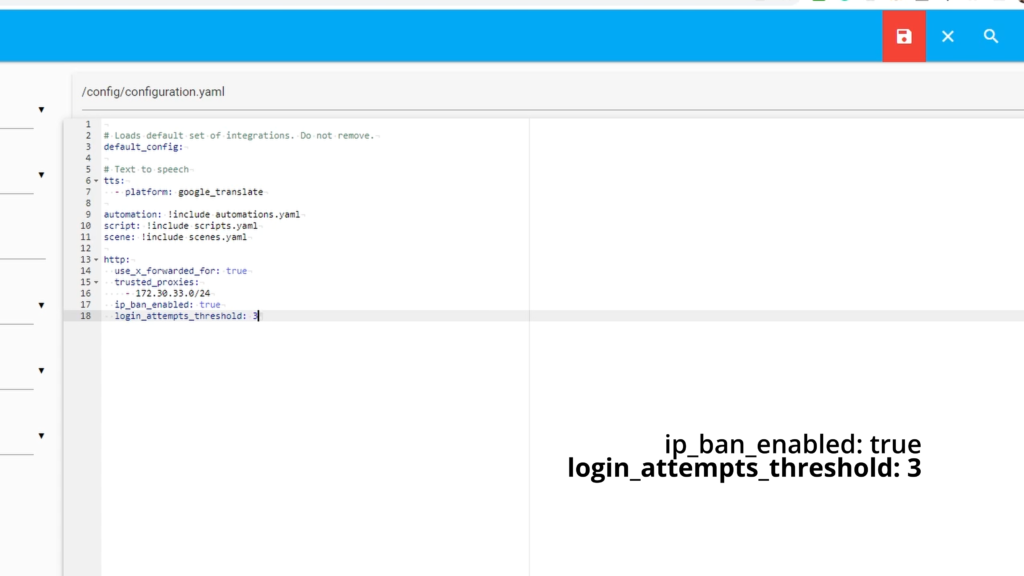
Once saved, Click Developer Tools, then Check Configuration. If all is well, click Restart, then confirm.
Thank you for reading. The below is optional but this will help us to purchase kit for review, and to support both the YouTube channel and website costs. We may earn a commission if you purchase something through these links.
Amazon link (as an Amazon associate we earn from qualifying purchases) – https://amzn.to/3fj2S8a
Ko-Fi – https://ko-fi.com/smarthomeaddict
Buymeacoffee – https://www.buymeacoffee.com/smarthomeaddict
Patreon – https://www.patreon.com/smarthomeaddict