Installing Home Assistant on Synology NAS using Docker
In this guide we will set up the Home Assistant container on Docker on the Synology range of NAS systems. These are versatile network storage devices that allow you to run a number of network apps, including Docker. Note that there are a few systems that do not have the CPU power or memory to be able to run Docker.
We’ll assume you already have installed Docker on your Synology NAS. If not, you should be able to install using the Package Center, or alternatively we are working on a video series covering the Synology NAS systems on our other channel, Homelab Addict.
If you don’t yet have a Synology NAS, take a look at the following models:
- DS720+ 2 Bay NAS Enclosure – https://amzn.to/3RlmKsW
- DS420+ 4 Bay NAS Enclosure – https://amzn.to/3qcl5Ka
- DS920+ 4 Bay NAS Enclosure – https://amzn.to/3Bdsnn6
- DS1621+ 8 Bay NAS Enclosure – https://amzn.to/3CW7Wwk
NAS drives:
- Seagate IronWolf 8TB NAS drive – https://amzn.to/3Rzk4Yf
- WD Red Pro 8TB NAS drive – https://amzn.to/3Qg2xTV
- Toshiba 8TB N300 NAS drive – https://amzn.to/3wW0KMW
First we’ll create the directories we’ll be storing data under. Open File Station. Select the Docker folder. Create a folder and name it homeassistant. Open this folder and create another folder. Call this one config. You should have a directory tree as shown in the sidebar.
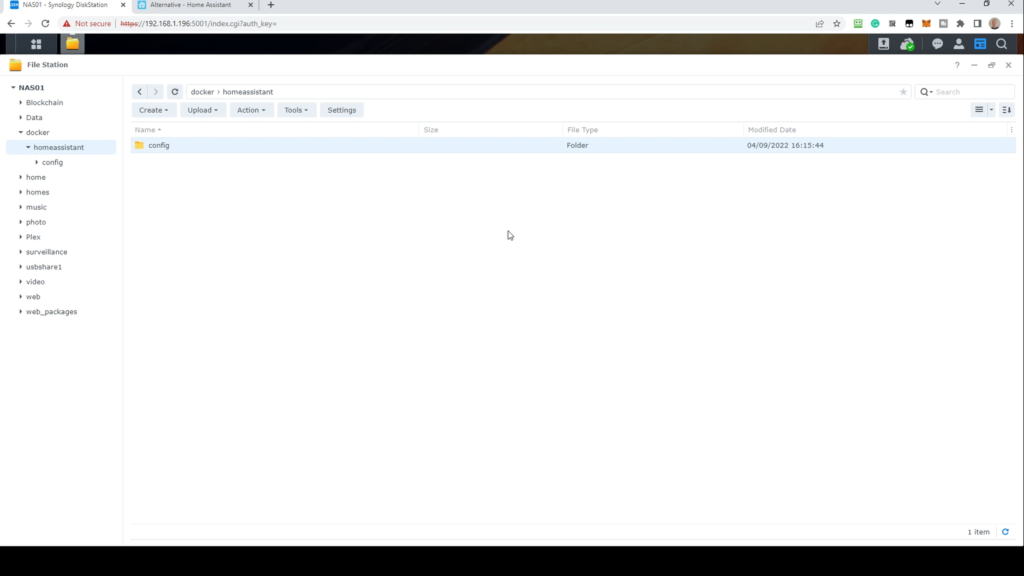
Now close File Station.
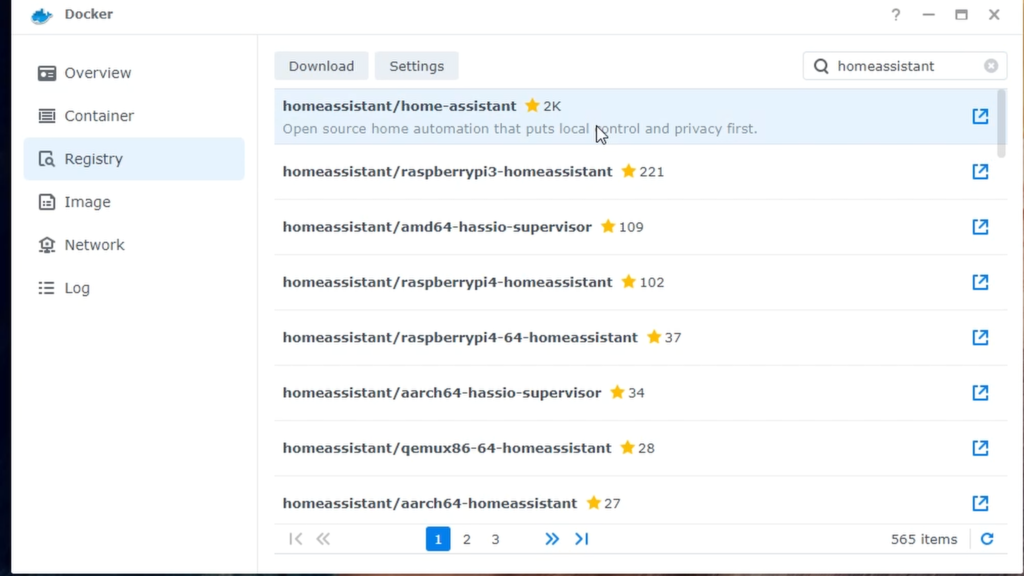
Open Docker. Go to the Registry. We will need to download the latest home assistant image from here. In the search bar, enter homeassistant as one word and press enter. Look for the result homeassistant/home-assistant. Either double click or select it and click Download.
You’ll be asked which version you want to download. Select Stable or Latest.
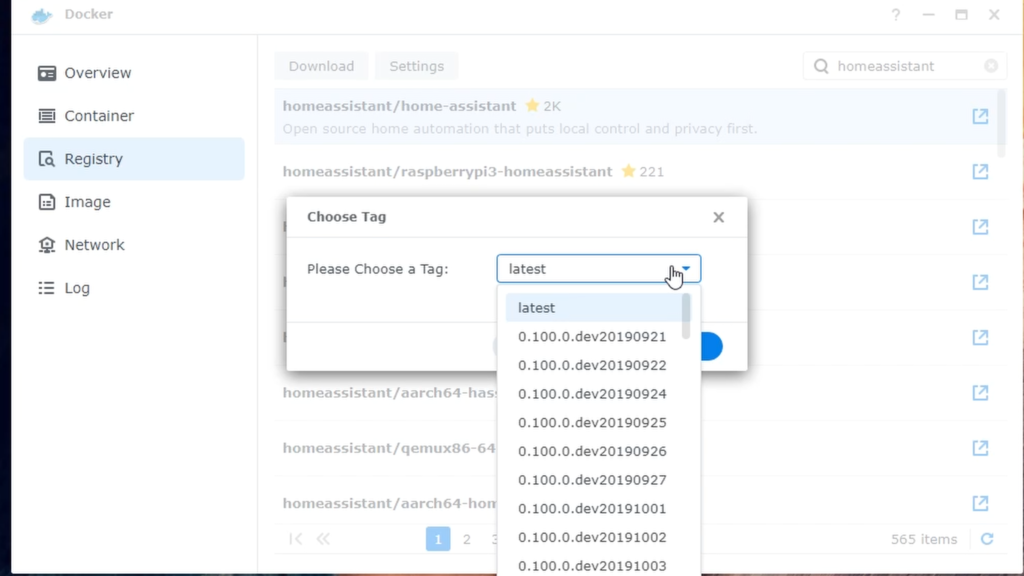
This may take some time depending on your internet connection, we’ve sped this process up.
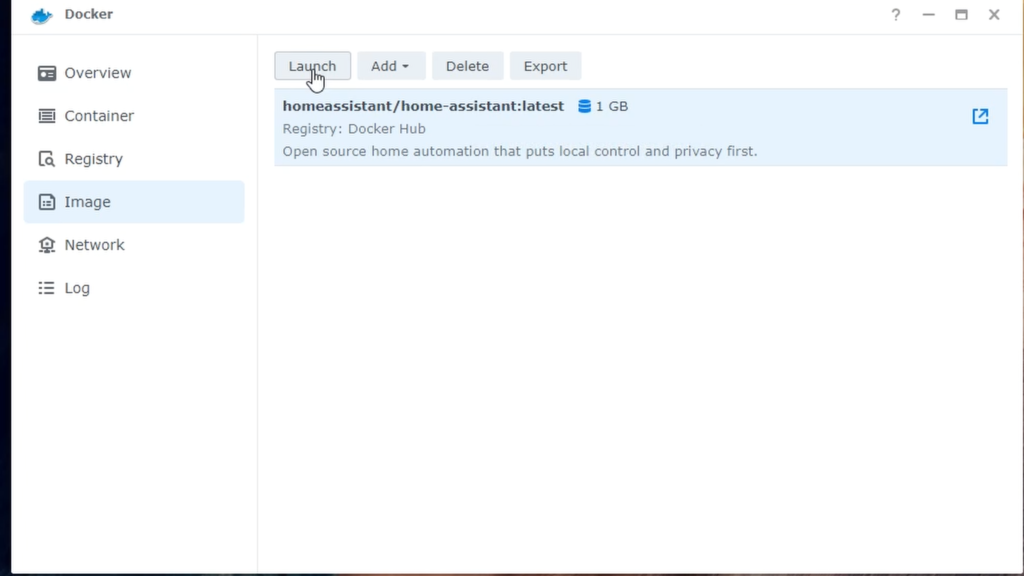
Once it’s downloaded, go to the Image section of the Docker app.
Select the image and click on Launch.
So that we can access Home Assistant on the same IP address as your NAS, select Use same network as Docker Host.
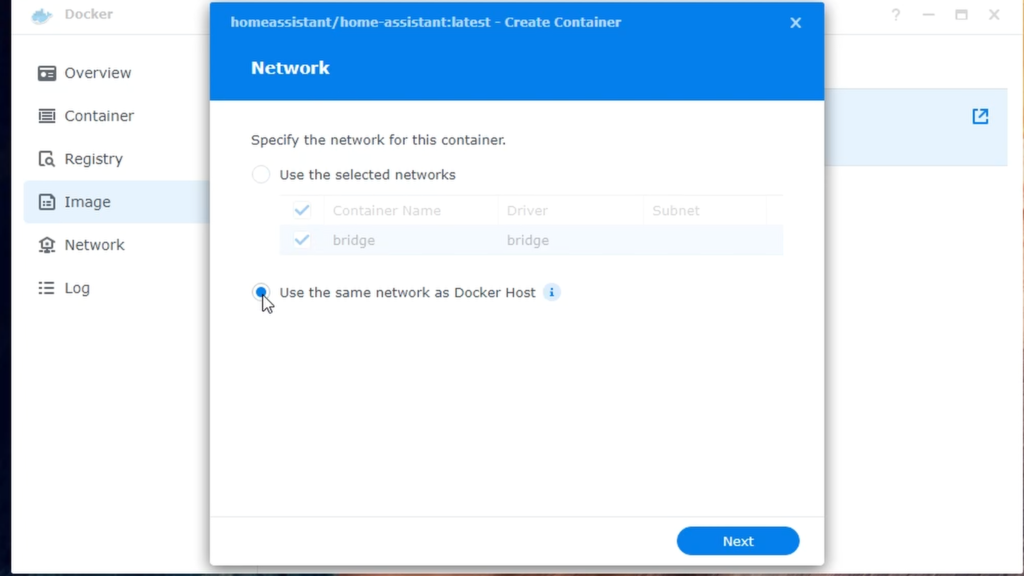
Click Next.
Now choose a container name you want, such as homeassistant. It’s also a good idea to enable auto-restart.
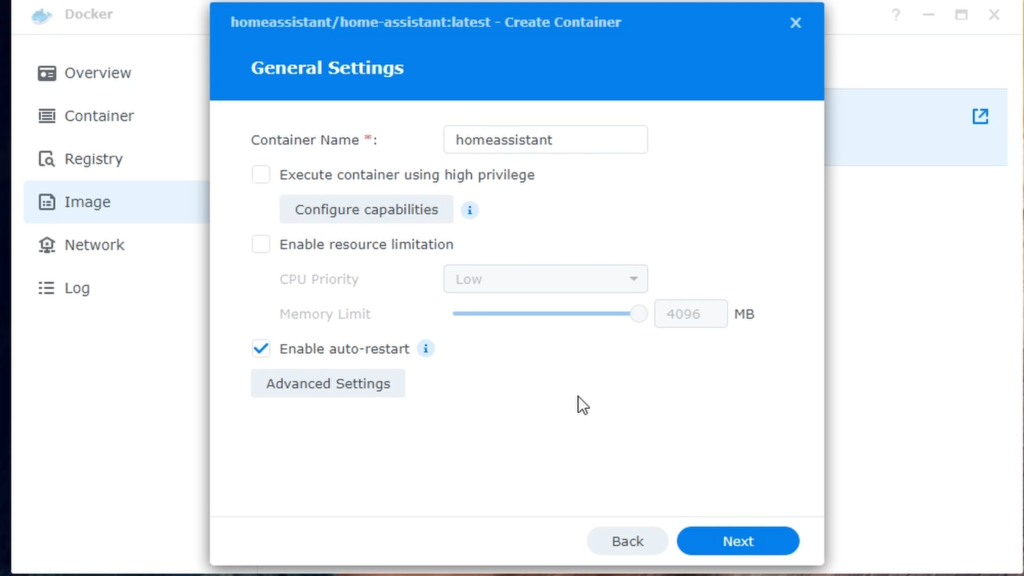
Click Advanced Settings.
In the Environment tab, click Add. In the variable section, enter TZ. In the Value section enter your timezone, for instance Europe/London.
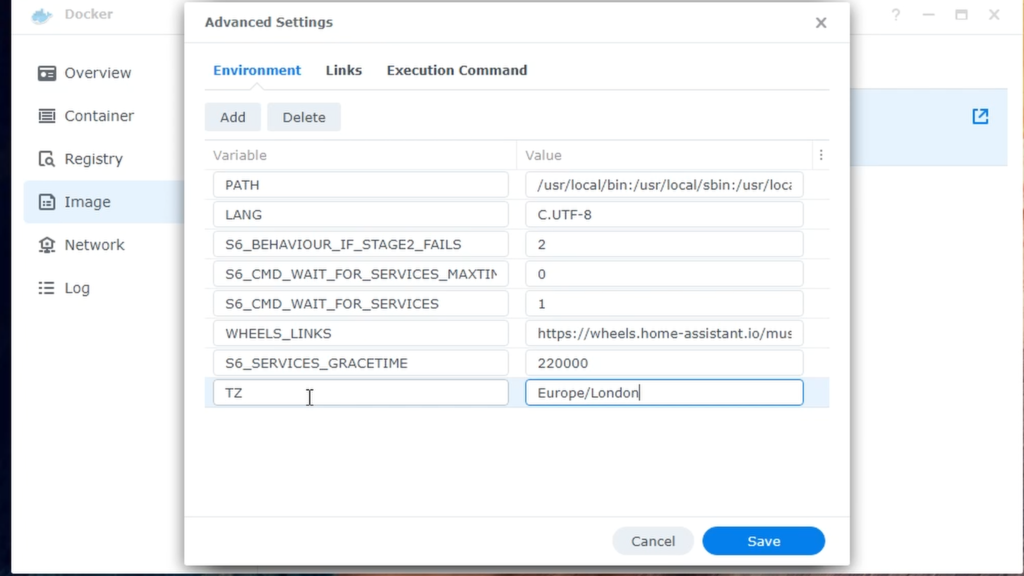
Click save.
Click Next.
In Volume settings, click Add Folder. We’ll choose the folders we created earlier. You can also create folders from this screen. Expand Docker, then expand homeassistant, then select config.
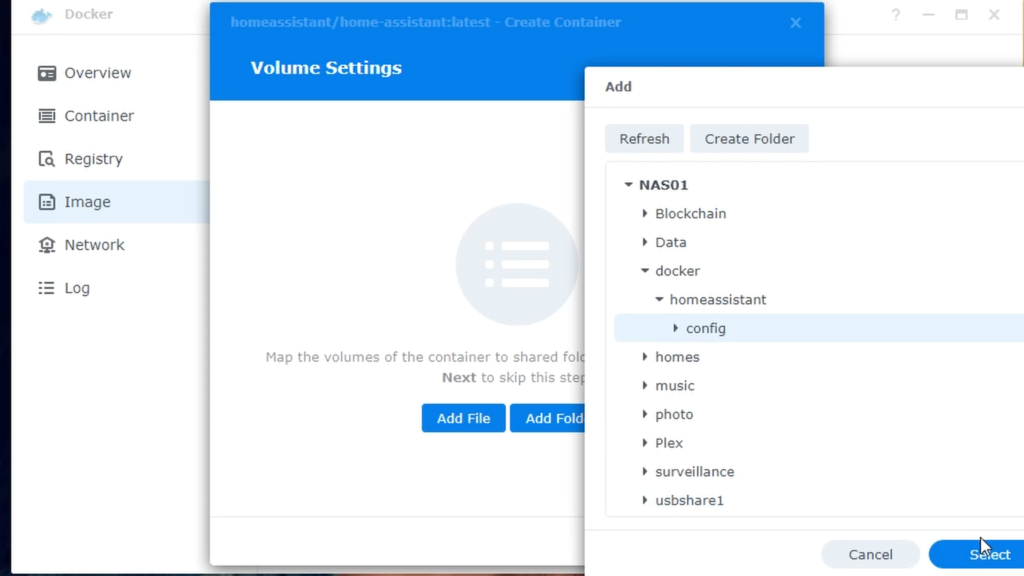
Click Select. In the mount path, enter /config.
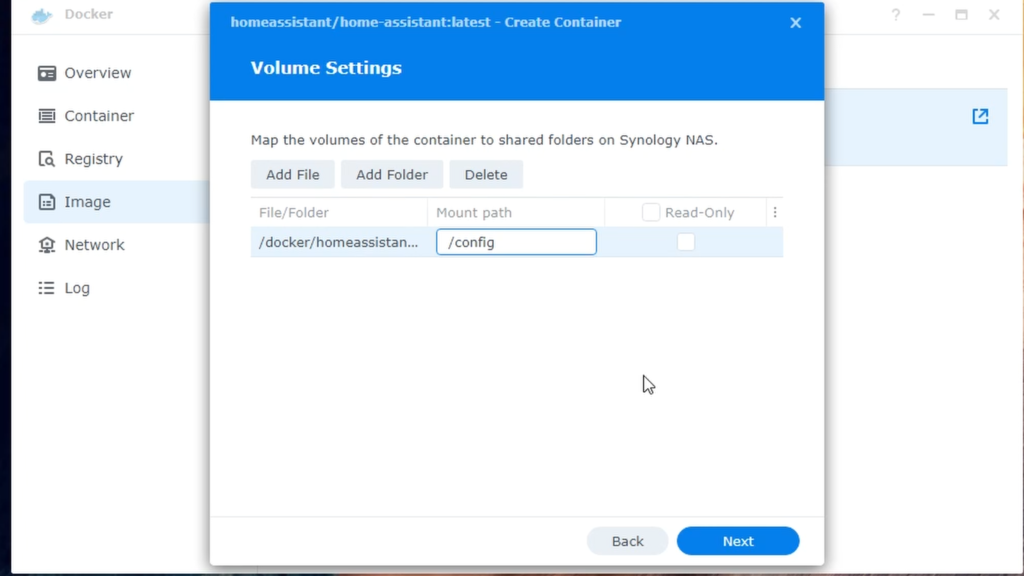
Click Next.
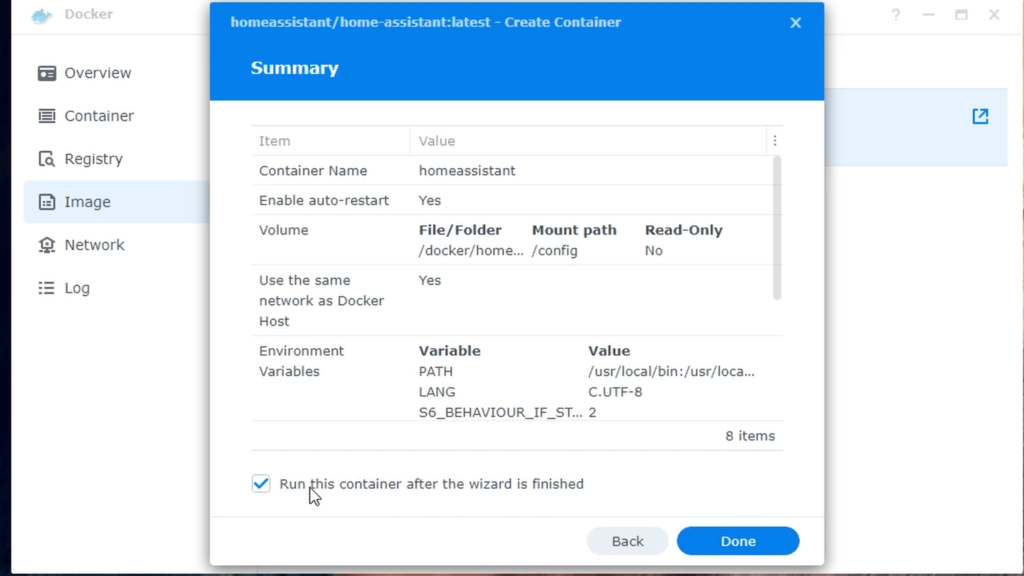
You’ll be presented with a summary screen. Ensure the ‘Run this container after the wizard is finished’ box is ticked and click Done.
Your Home Assistant within Docker should now run and will serve the web interface from port 8123 on your Docker Host. Use the Docker app to control the container and to see statistics about usage.
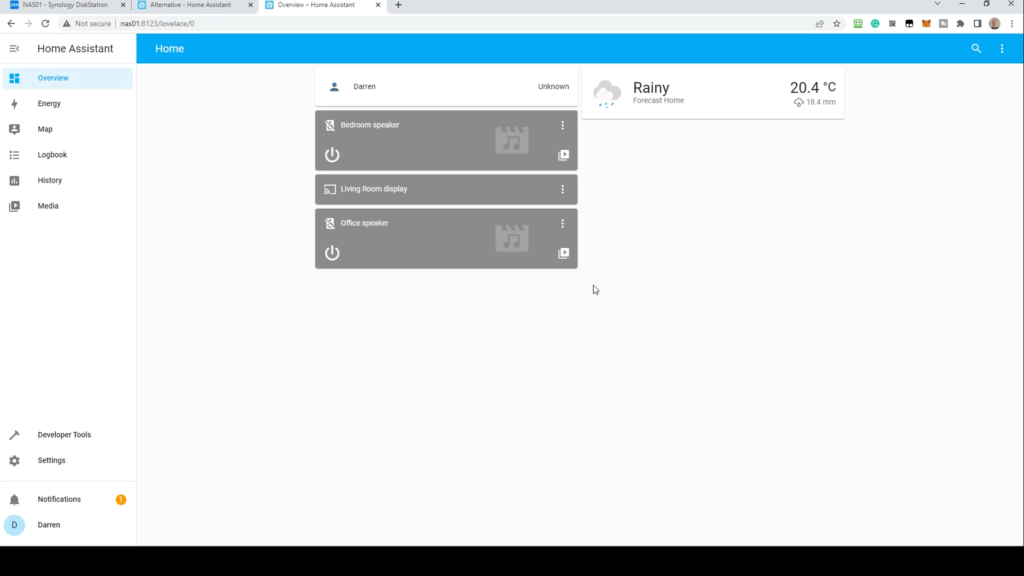
Use the NAS IP or name followed by :8123 to browse to Home Assistant. Fill in the wizard with your details. At the end you’ll be presented with a basic dashboard.
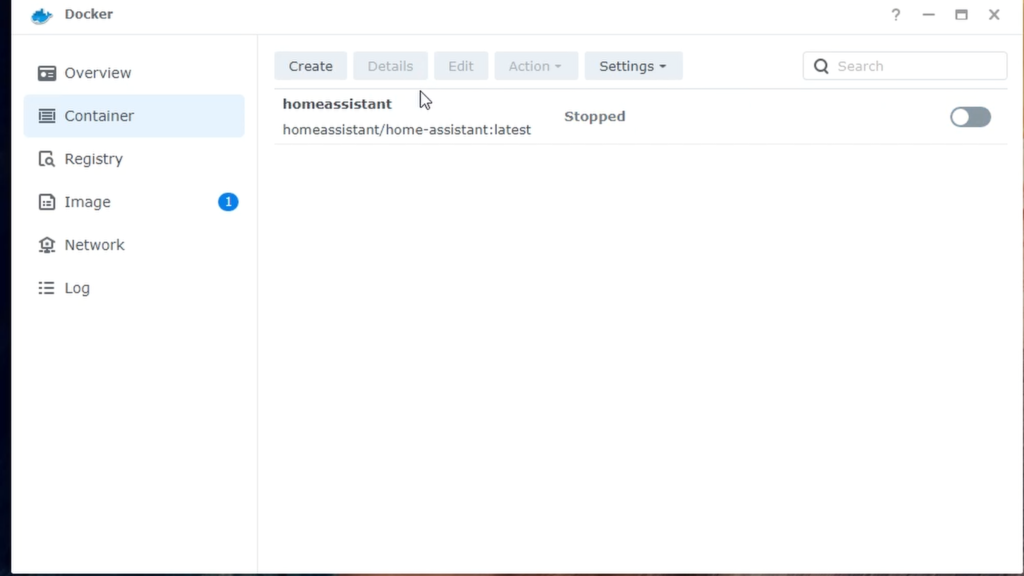
If you need to update Home Assistant, open the Docker app. Go to the Registy section. Find homeassistant/home-assistant in the registry and click on Download. Choose the stable or latest tag. Docker will re-download the newest image. Once you get the notification, move to the container section. If the container is running, use the toggle switch to stop it.
Click on the container and select Action, Reset.
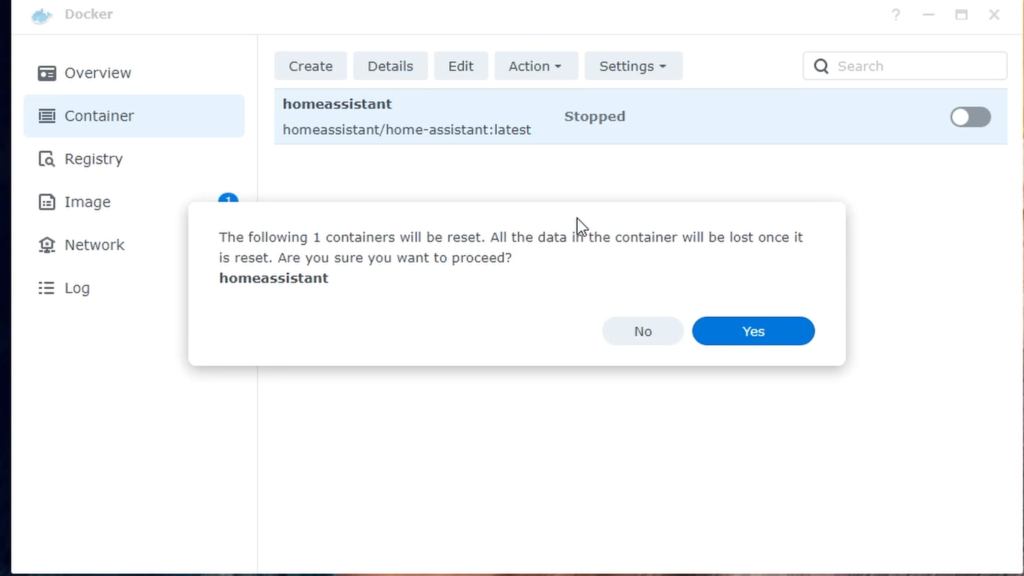
You won’t lose data, these files are stored in your config directory. Start the container again.
If you ever need to restart the container, open the Docker app and move to the container section. Select the container and click Action, Restart.
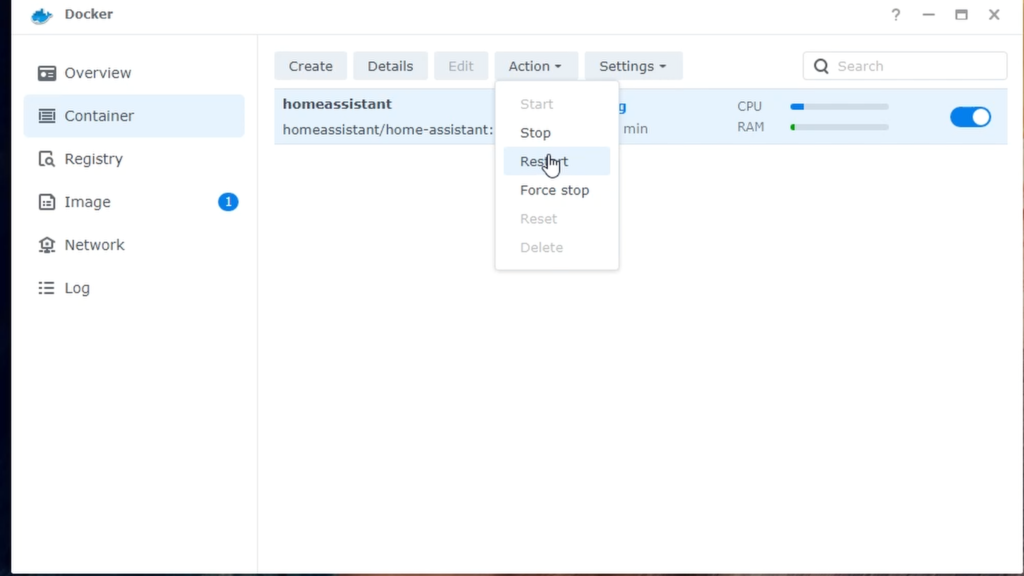
Home Assistant will now restart.
Finally, if you click on the Overview section, you can see a summary of memory and CPU usage for Docker and the individual containers.
