Installing Home Assistant on Docker, Docker Compose and Portainer
In this guide we will demonstrate how to install Home Assistant in Docker. We’ll start with Docker itself, then we will show how to install in Docker Compose, and finally in Portainer.
Docker is a containerisation technology that allows the creation and use of containers, which are processes that run independently of each other. This maximises the use of resources on a system. It can run on a wide range of devices, and many thousands of docker container images are available.
Docker Compose is a tool developed to help define and share multi-container applications, using a YAML file to define the container environment. The YAML file can be backed up and used to deploy the same container environment to another environment.
Portainer is a web front end for the management of a Docker environment. There’s a smaller learning curve than using the command line. You can see the state of individual containers and start and stop them. You can also manage multiple docker instances.
We’ll assume you already have a Docker environment on your system. If you don’t, we have a link to some helpful videos on installing Docker and Portainer in our other YouTube channel, HomeLab Addict.
Docker environment
First of all we want to create the container. We do this by using the following command. We’ll stop at this point to break the command down:
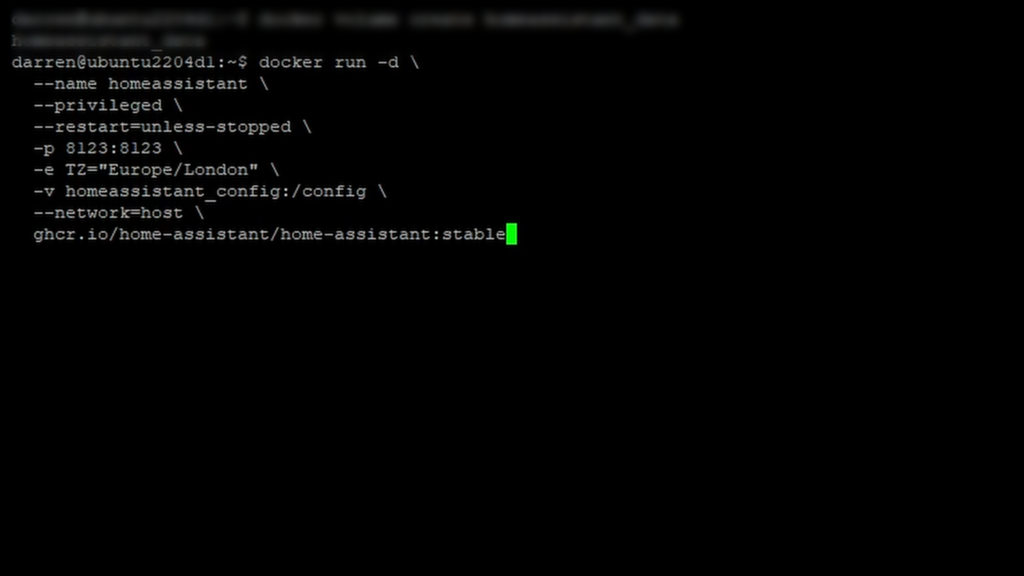
docker run is the ‘run’ command to launch a container
d means that the container will run ‘detached’ from the running terminal
name is the name we want to give the container, in this case homeassistant
privileged gives the container root privileges to all devices on the system Docker is running on
restart=unless stopped means that the container will be kept running until manually stopped
p opens a network port, in this case the standard Home Assistant port 8123
e sets environment variables, in this case TZ means Time Zone
v creates volumes network=host uses the hosts’ network stack inside the container
finally the bottom line is the image itself which will be downloaded.
When the command is run, you’ll initially get a message saying that the image can’t be found locally. That’s expected. It will then proceed to download or pull the image. This may take a few minutes.
Once complete the image will run, and you can configure Home Assistant. This step will be covered later in this guide as it’s identical for all 3 methods.
Docker Compose environment
Docker Compose uses a YAML file to create containers. The benefit of this is that configuration is kept in one file, meaning you can back up your containers. It’s also beneficial to choose a location to keep your Docker setup, for the purposes of this video we’re using /opt. Some people use their home directory, or you can create your own structure.
We’re going to use the nano editor to edit docker-compose.yaml. If the file doesn’t yet exist it will be created. In this example we’ve already got an entry for Portainer. Simply move to the bottom of this file (or the top if freshly created) and create the following – it’s replicated below the image for you to paste in.

  homeassistant:
    container_name: homeassistant
 image: "ghcr.io/home-assistant/home-assistant:stable"
 volumes:
   - /opt/homeassistant/config:/config
   - /etc/localtime:/etc/localtime:ro
 restart: unless-stopped
 privileged: true
 network_mode: host
Similar to the command line, we give a container name, image details, volumes, restart, privileged setting and network mode.
To save the file, press Control-X. Press Y to confirm, then press enter to save the file.
To bring the containers in your docker-compose file up, use the following command:
docker-compose up -d
Docker compose will now download and create the container. Again this may take a few minutes.
Portainer environment
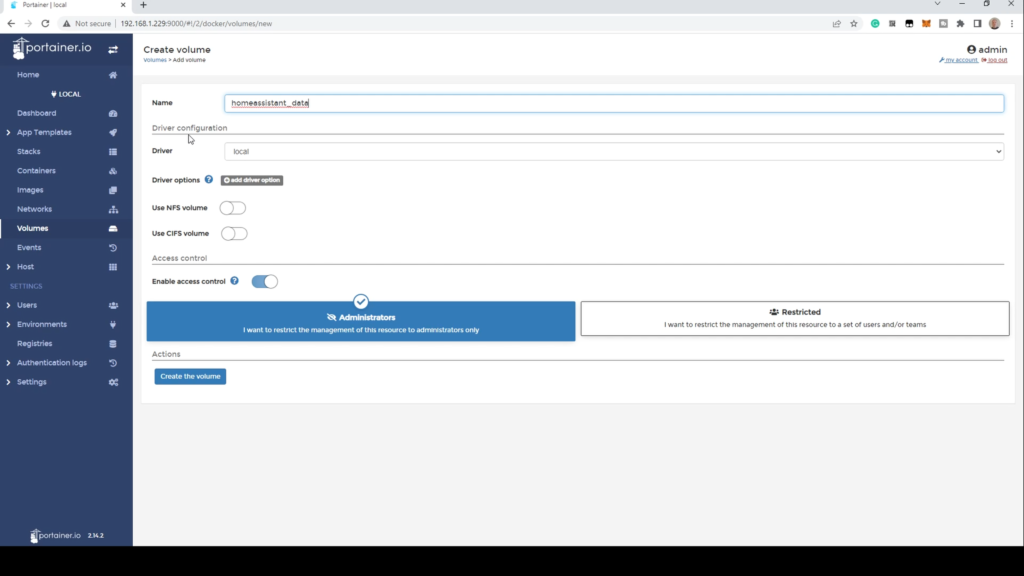
Portainer makes it easier for those not used to the command line to run Docker containers and to control them. Go to Volumes in the left pane, and New Volume. Give it a name like homeassistant_data. Leave the other settings as default and click Create the volume.
Once you get the confirmation, go to Containers in the left pane and Add container. Give it a name – homeassistant. For the image, enter homeassistant/homeassistant:latest. This will ensure that every time the container is started it pulls the newest image. Click Add a network port. Enter 8123 in both boxes.
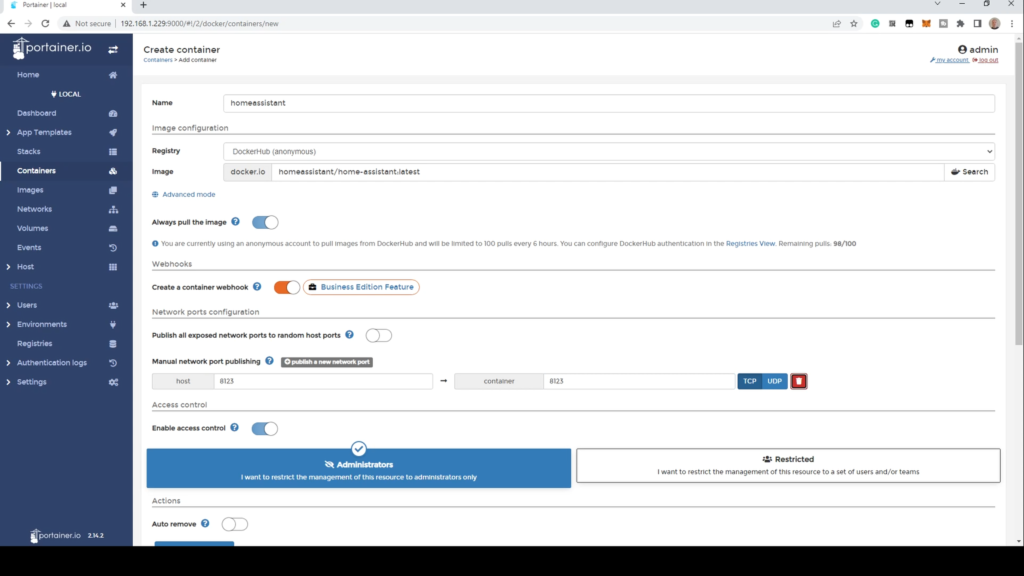
Scroll down and click volumes. Click Map additional volume. In container, enter /config. In volume, click and select the volume we created earlier. Click Env and Add an environment variable. Enter TZ and in the value, enter your timezone, in this case Europe/London. Click Restart policy and select Always or Unless Stopped. Click Runtime & Resources and turn on privileged mode.
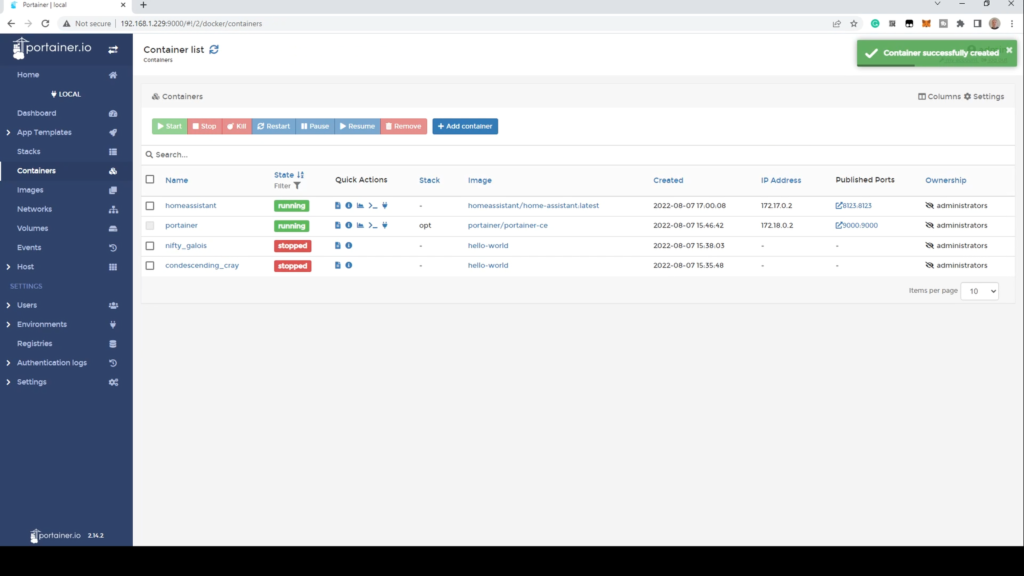
Finally click Deploy this container. This may take a few minutes depending on the speed of your computer and your internet speed. When it’s completed you’ll get a confirmation and you’ll be returned to the containers screen showing the running containers. If homeassistant is showing as green you’re all set.
Setting up Home Assistant
Open a browser tab. You should be able to access Home Assistant at the IP of the docker machine followed by the port 8123. If all is well you’ll get a Home Assistant logo and a wizard asking you to fill in a few details.
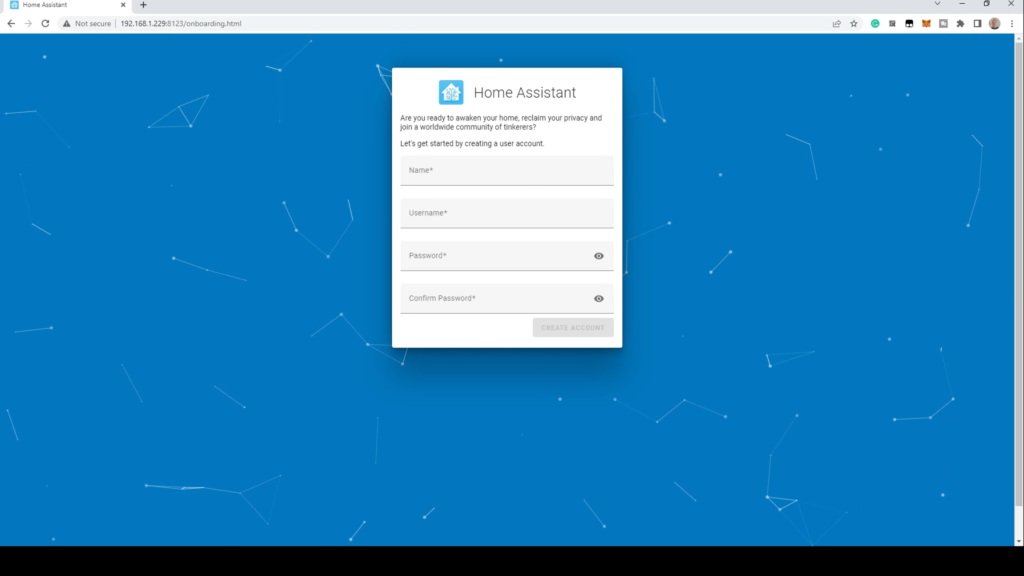
If you get a message advising Home Assistant is still setting up, give it a few more minutes and try again. Enter your name, a username and password and click Create Account. On the next screen, enter a name for your home, choose your location and unit system, then click Next. On the next screen you’ll be asked if you want to send usage data to the developers, then click next. Finally Home Assistant will show a summary screen containing detected services. Click Finish. Home Assistant is now ready to be set up.
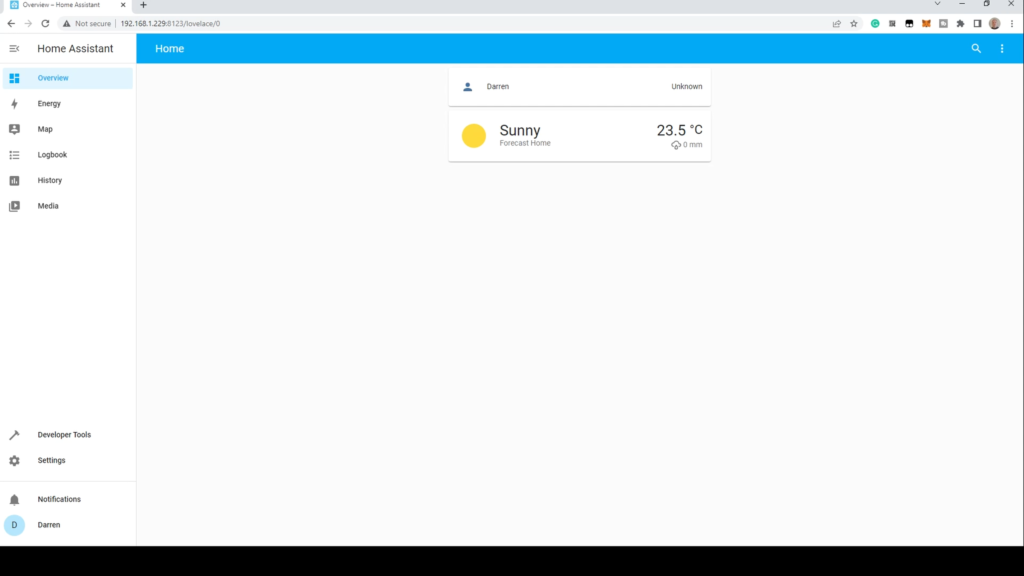
Home Assistant on Docker has some differences from the OS install we’ve covered previously. Primarily this is that the Docker install has no managed updates and no Addons. That’s not really an issue, you’d just stop Home Assistant, backup then pull the latest image. For Addons, you’d use containers for things like Node Red or an MQTT broker and use an integration. The scope of this is beyond this guide, it will be covered in a future article.