Introduction to Node Red in Home Assistant
Node Red is a flow-based programming tool for automations. It uses a flowchart and wiring layout to write automations in a visual way. Nodes are used to represent elements such as entities and logic making the flow of automations clearer. Node Red can be used in addition to the built in automation within Home Assistant, if you have any automations already set up these will be unaffected.
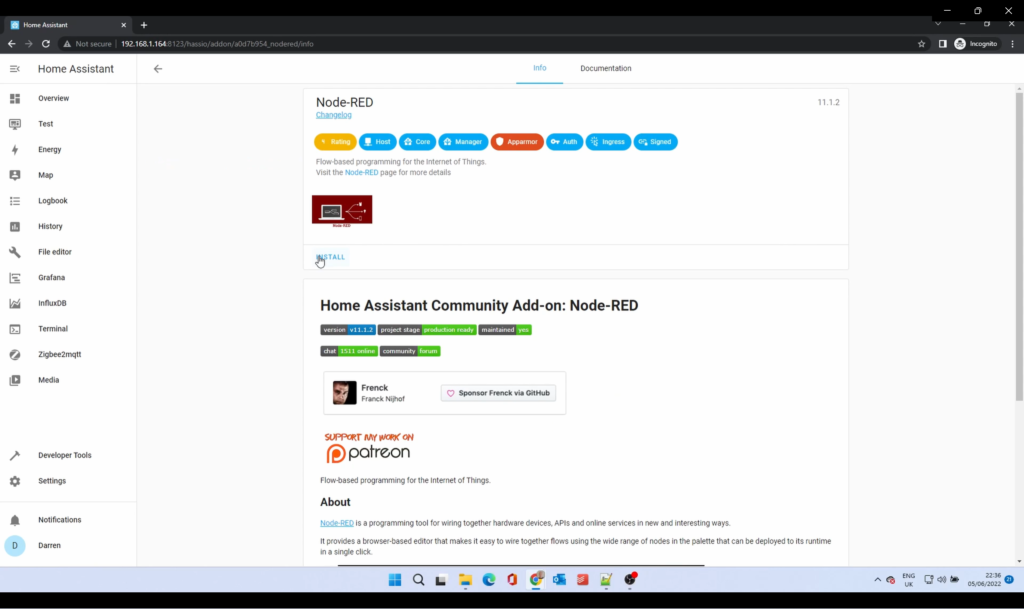
We’ll first install the Node Red addon. To do this, go to Settings, Addons, Addon Store, Node Red. Click on Install.
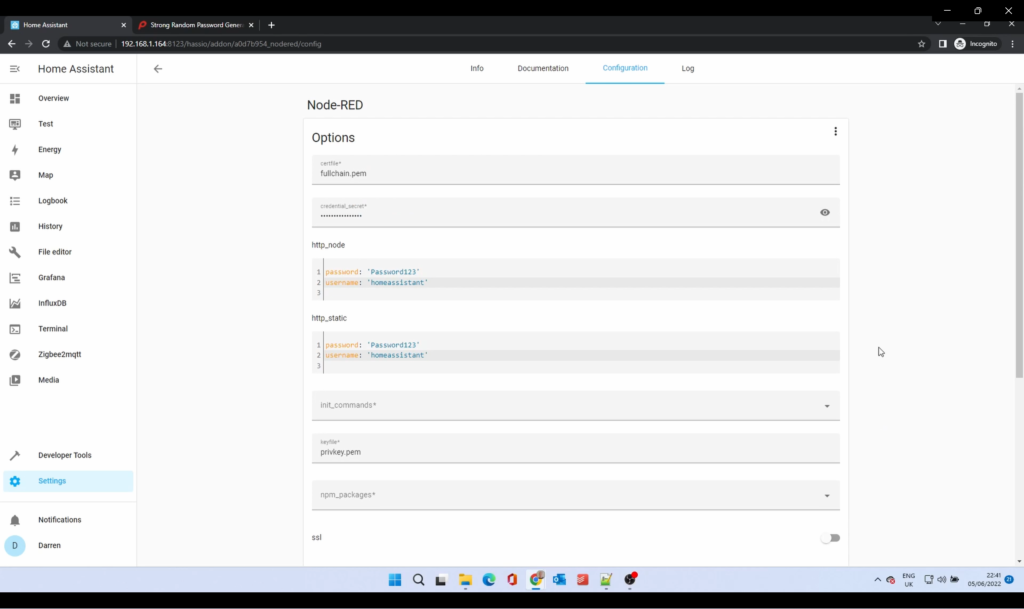
When it’s installed, click Configuration.
For the Credential Secret, enter a password. Ideally this needs to be a secure, randomly generated one. We recommend generating one at passwordgenerator.net. Copy and paste the password in. Keep a note of this somewhere. Enter username and password in http node and http static. Disable ssl. If you’re on an older version, also disable require ssl. Click save.
Go back to Info, Show in sidebar, Start. If it stops, check the log. If you get a message advising your password is in the haveibeenpwned database, this is the credential secret. Try another one.
Click Node Red in the sidebar to launch it. If this is the first time you’ll see a short introduction, either click through this or click the X.
At its most basic level, Node Red takes an input, and triggers an output. To introduce the various sections:
On the left hand side, this contains all of the nodes that are installed. These contain things like devices, logic gates, delays and many other nodes. These can be clicked and dragged. You can drag multiple versions on. The space in the middle is called a flow. You can have many flows, represented as tabs. Flows of nodes are called a sequence. You can double click a node to rename it.
On the right hand side, you can see information about the nodes in the flow. There’s a help and a debug section. From the hamburger menu you can import and export flows, edit and change views.
We’ll create a basic light automation to demonstrate how Node Red works.
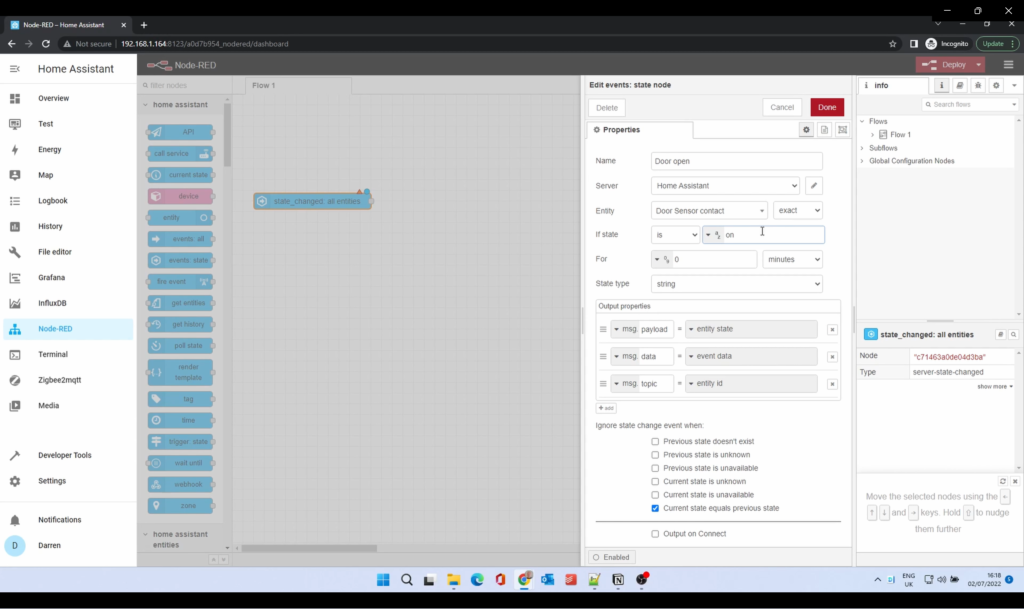
Drag and drop the events:state node. Double click on it to change it’s properties. Name the node, in this case Door open. Server should be Home Assistant, if this is not showing, click on the dropdown and Add New Server.
Click on the Entity. Start typing the name, in this case Door. I selected Door Sensor contact.
If state is should be ‘on’. Click Done.
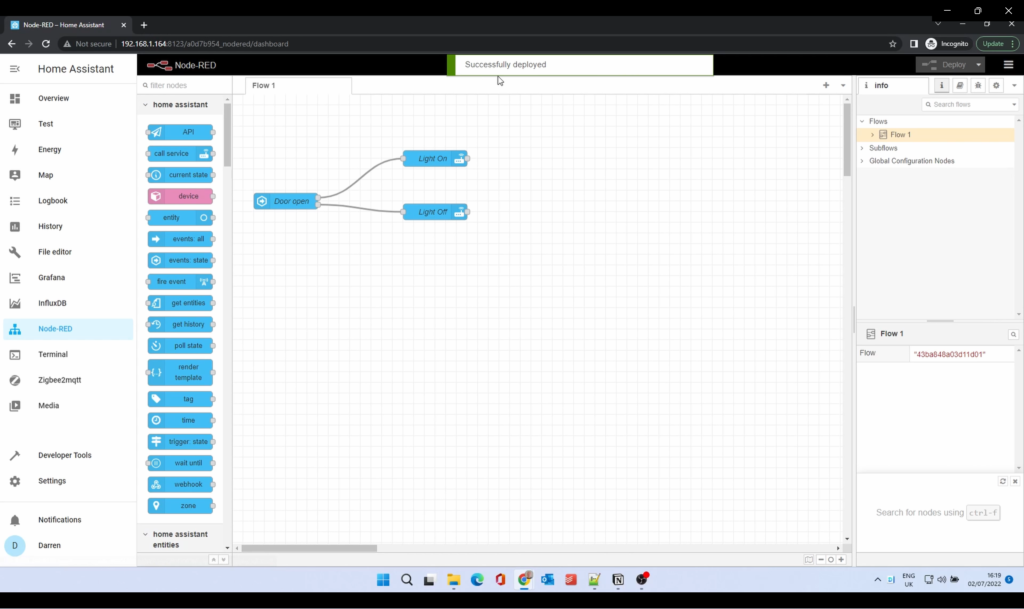
We want to turn the light on, so drag and drop Call Service. Give it a name, like Light On. Domain is light. Server, is turn_on. Click Device and select the device. Click Done.
Drag a box around the Light On node and press Control-C. This will copy the node. Control-V to past the node. Double click on the second Light On node. Change the service to turn_off. Change the name to Light Off. This is quicker than creating a new node.
To get the nodes to interact, we need to wire them. You’ll note 2 dots to the right of the Door open node. The top one is active when the node is true. The bottom when the node is false. Using this we can trigger the two light nodes.
Click the top dot and drag to the corresponding dot on the right of the Light On node. This will draw a wire connecting the nodes. Do the same for the bottom dot to the Light Off node. Click the Deploy button on the top right to save the flow.
After a few seconds you’ll see ‘Running’ under the Door open node. Open the door. You’ll see it’s showing as on and the time it was triggered. You’ll also see the corresponding information under the Light On node. Now close the door. The sensor will show a red icon and off, and the Light Off node will show the time it was triggered.
As it stands this is a very basic on-off automation. But what if you want to keep the light on for a short while after the sensor is no longer active? We can put a delay into the action to achieve this.
Move the Light Off node if you need to make room. Scroll down to find the delay node. Drag this onto the wire connecting the Light Off node. This will connect in between the two nodes. Double click on the node. Change to time to suit your circumstances. For the purposes of this article, we’ll set this to 15 seconds.
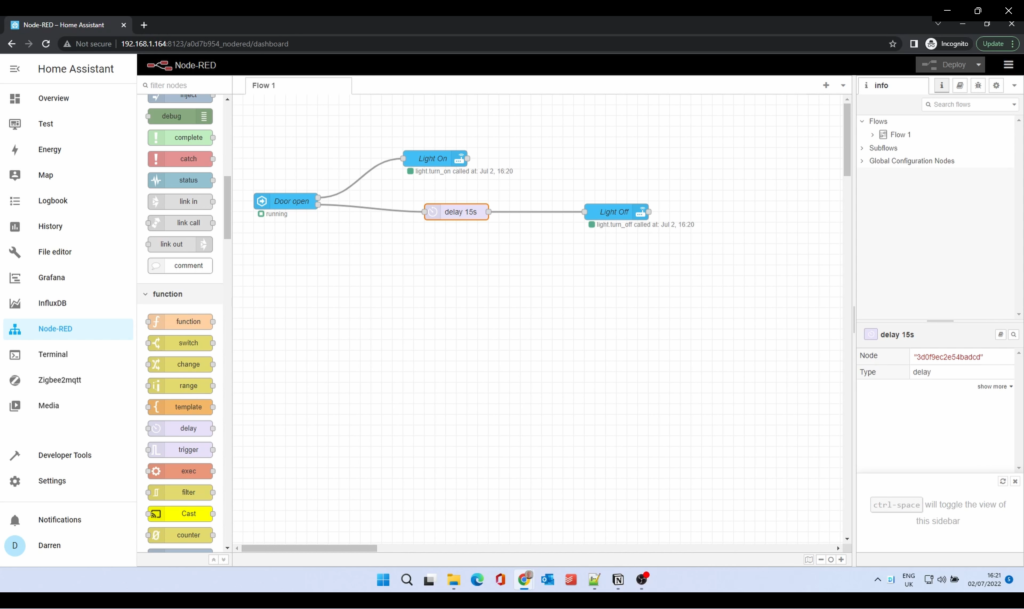
Click Deploy again to save the flow. Wait until it’s running and open the door. As before the nodes will show they’ve been activated. Close the door. You’ll see the time the sensor went off, and the delay node will show it’s active. After 15 seconds, the Light Off node will activate.
If we come out of Node Red and view the dashboard, we can see this working. At the moment the door sensor contact is showing as Closed. The light is also showing as off.
This was a basic introduction to Node Red and we intend to cover this in greater detail. A number of articles are in production and we’ll release these in the near future. Let us know in the comments below if you have any subjects you’d like us to cover.