Home Assistant Remote Access using DuckDNS and LetsEncrypt
In this guide we will cover setting up remote access using DuckDNS, and using LetsEncrypt to secure the connection.
Why this method?
- It’s a quick and relatively easy way to get remote access to Home Assistant.
- It provides an SSL certificate to keep your connection secure.
Some downsides
- There is a need to open up a port in your router to forward the port.
- Internal access will now report a certificate error, but you can safely ignore this. Using NGINX as a reverse proxy will resolve this but this will be covered in an upcoming video.
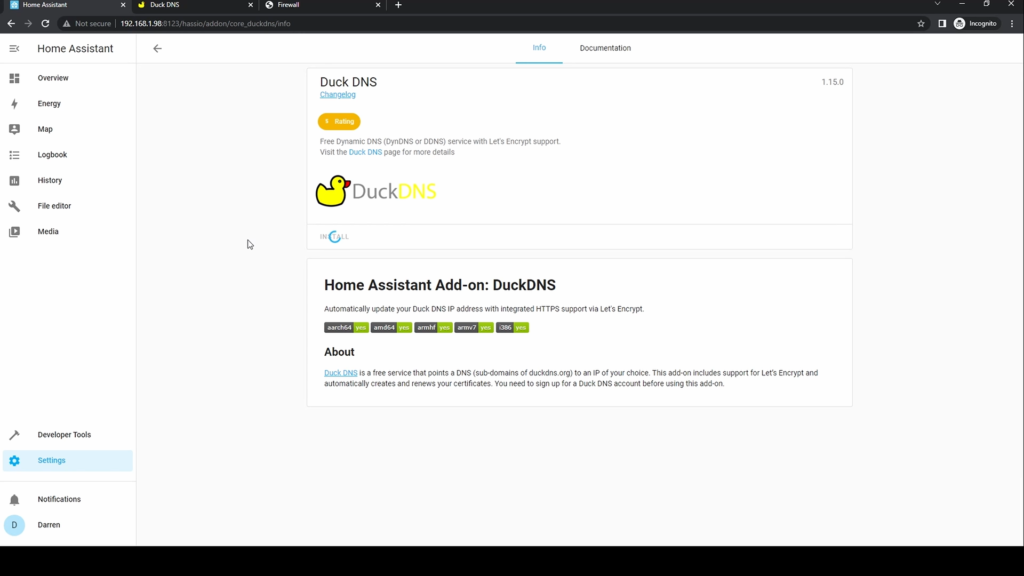
Lets make a start by installing the DuckDNS addon. Go to Settings, Addons and then click on Addon Store. Click DuckDNS. Click Install. Once it’s installed, enable the watchdog and go to the Configuration tab. As you can see, we need some information to add to the config. We will need to set up a domain within DuckDNS.
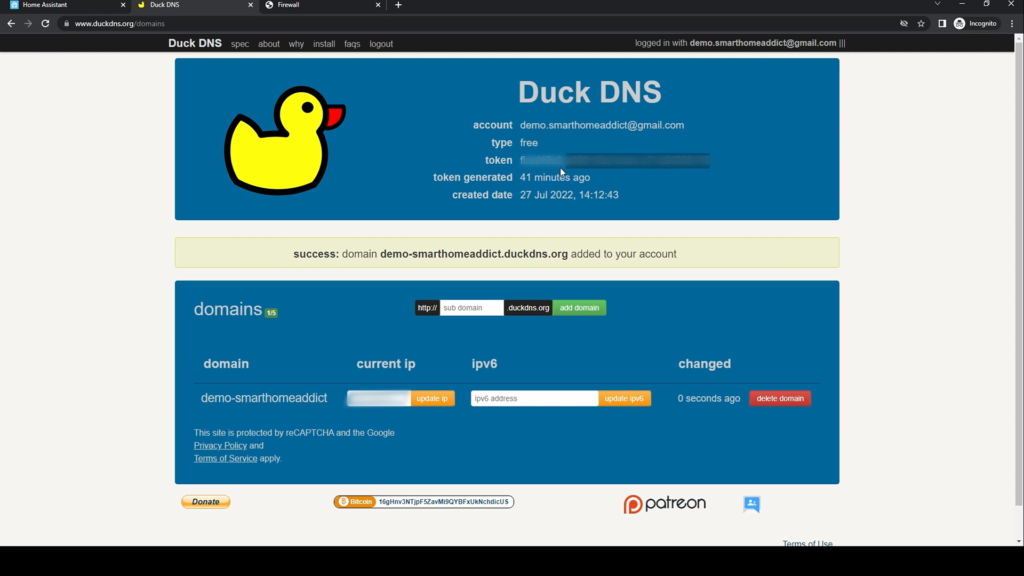
Go to DuckDNS.org. Sign in or create an account. Create a domain with the name of your choice, it will end in duckdns.org. Click Add Domain.
The domain will then appear below. To link your account with the addin, select and copy the string in the token field. Don’t give anybody this token, as it’s a security risk to share it.
Go back to Home Assistant and the DuckDNS configuration page.
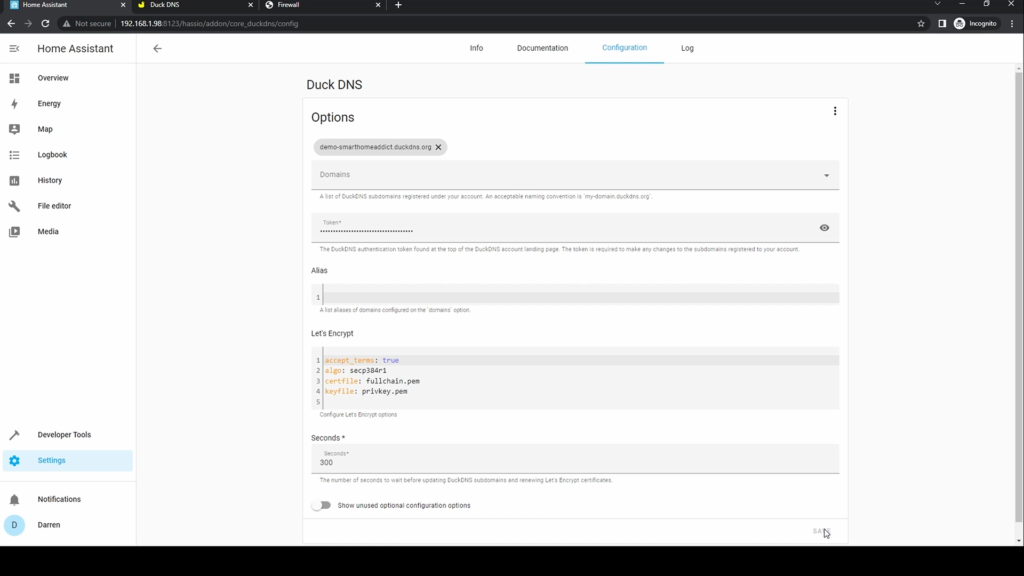
In the token field, paste the token you’ve just copied. This will appear as asterisks. In the Let’s Encrypt section, change false in accept terms to true in order to allow the addon to request an SSL certificate. In the domains field, enter the domain you’ve just created. Then click the x within the empty domain to remove it. Finally click Save.
Go back to the Info tab and click Start. Wait around 10 seconds, and then click on the Log tab. If all is well, you should see the process of obtaining and applying the certificate, click refresh if it’s still not complete.
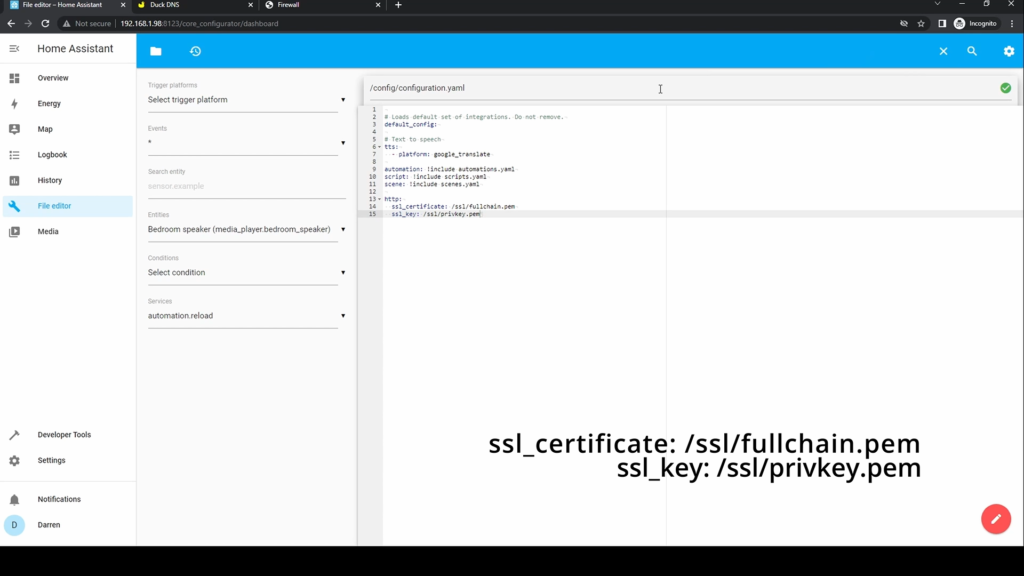
We now need to let Home Assistant know it’s using an SSL certificate. To do this, edit the configuration.yaml file and add an http section, then add the following two lines. These are included on the screen and also in the description below. Click Save.
Click Developer Tools, and check config. If there are any errors correct them – it’ll most likely be formatting within the configuration.yaml. If all is well click Restart.
Whilst Home Assistant is restarting, you need to forward a port in your router to allow traffic through so that you can access your Home Assistant instance from the Internet.
As we’re using an SSL certificate, we’ll be using https. This means that the traffic between your browser or mobile and Home Assistant is encrypted, so nobody can intercept or see what you are doing. The standard port for https is port 443, however Home Assistant is on port 8123. To make access simple so that you don’t need to add the port number, we’ll map 443 on the outside to 8123 inside your network.
Every router, every ISP is different. So what you’ll see here won’t necessarily be the same for your router, however the general principles are the same. From my port forwarding screen, I choose Create a new port forwarding rule. I give it a name. I click Show IP address and click in the box. I then enter the Home Assistant IP address. For the External port I enter 443 in both boxes, and 8123 for the Internal port in both boxes. The protocol is TCP. Once entered, I click the add icon, then save. It should now be listed in my port forwarding list.
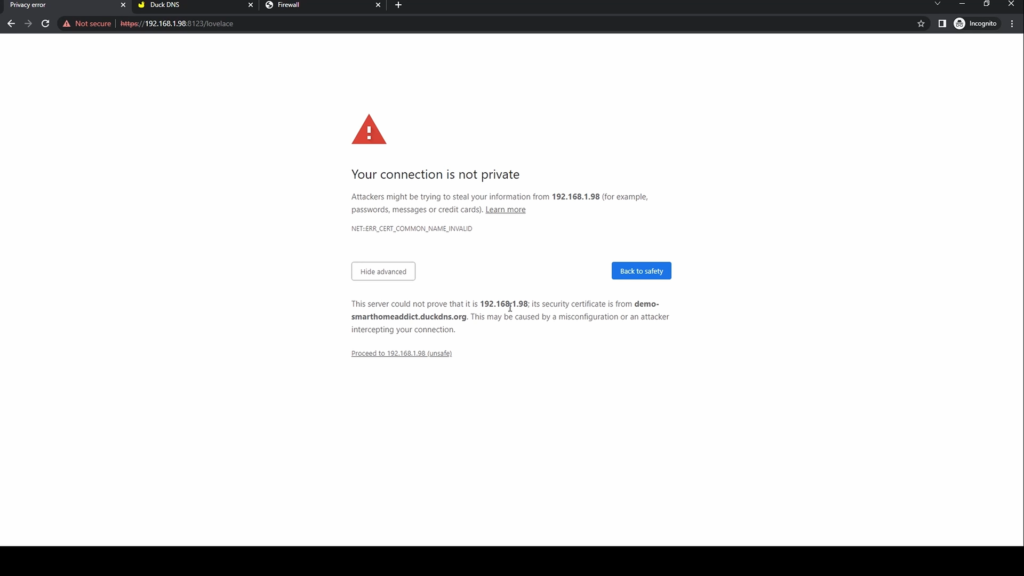
When you go back to Home Assistant, you’ll likely get an error. This is because you’ve turned on SSL, so we need to change the URL slightly to use https instead of http. Once you do this, you’ll get a warning that your connection is not private as we’re using the IP address. It is safe to ignore this as this is inside your network. Click Advanced, and then the Proceed link. Home Assistant will now display and you can use this as normal.
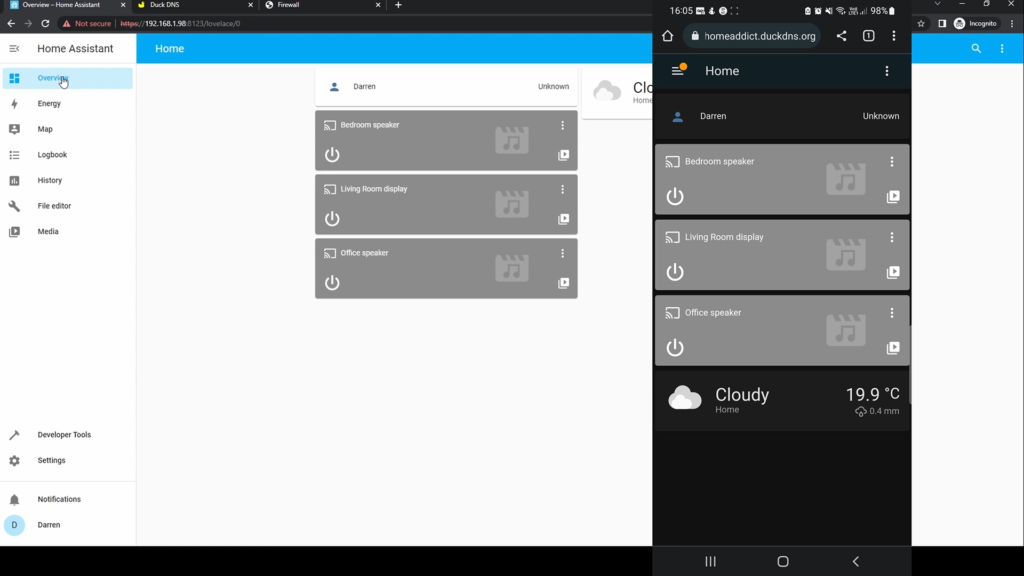
For access from outside of the network we’ll use a phone but this should work from any device, including from the Home Assistant app. To test you’ll need to turn off Wifi so you’re outside your home network.
From a browser, enter your DuckDNS url that you set up, ensuring you precede this with https:. Log in using your normal credentials. Once logged in, you can then operate home assistant as if you were browsing from your home network.
There are further measures you can implement such as IP Bans to prevent malicious attacks, but we will cover this in another article.