Review – Sonoff SNZB04 Door/Window Sensor
I have just received a pack of two of the above sensors. I ordered them myself. This is not a sponsored post.
As with the temperature sensor, this is a very small unit. The box is 5cm x 5cm x 2cm (2 x 2 x 0.8 inches).
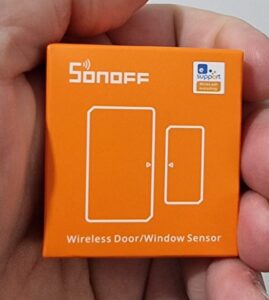
The devices run on the Zigbee communications protocol. This means you need to have a Zigbee hub, or a controller attached to your Home Assistant setup. It will work with Smartthings if you already have this as part of your setup.
Opening the box
The box contains the sensor itself, the magnet, a small manual, QC sheet and 3M sticky pad. The sticky pad is in two parts – one for the sensor and one for the magnet.
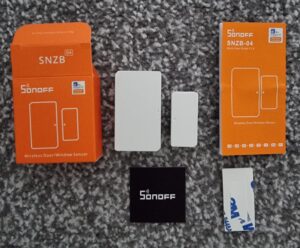
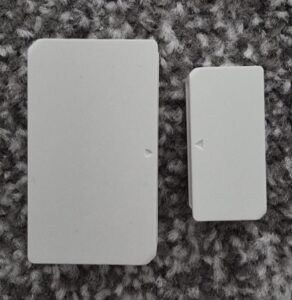
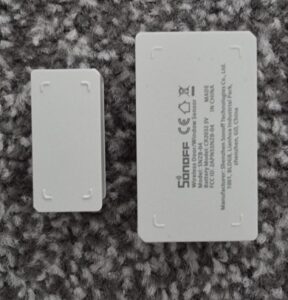
The sensor is rectangular in shape, with an arrow on one side. This matches up with an arrow on the magnet. There is a small hole on the bottom of the sensor. This is used to put the sensor into pairing mode.
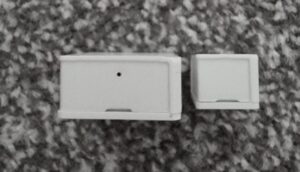
You have the option of installing it using Sonoff’s own app – eweLink. You do not need to install the app to get the sensor to work. The Smartthings hub or Home Assistant will work with it and you’ll be able to see the sensor readings and act on them in one less app.
Activating the battery
The device comes with the battery isolated using a tab. This prevents the battery from running flat in transit. To remove this, you need to open up the sensor. It’s not difficult but it is fiddly, you may need a small flat headed screwdriver. You might be lucky and it’ll separate with finger pressure. Be careful whilst doing so, and gently ease the cover apart. There are a number of small plastic tabs inside that look like they’ll break easily.
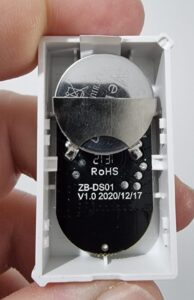
The battery is a standard lithium CR2032 button cell battery. These are widely available and relatively cheap so it’s wise to keep a small number of spares to hand.
Be very careful removing the plastic tab. It covers the bottom of the battery, so when you pull, the battery will come out with it.
Before putting the back cover back on, double check that the battery is in securely and not loose. A number of people have reported issues with this, and it’s probably a design issue. If this is happening to you, remove the battery. Either use a screwdriver to lift the battery tabs or apply pressure to the battery cover to bend it slightly. Then put the battery back in.
Installation in Smartthings
To simplify this review I’ve installed the temperature sensor using Smartthings. I will write another post describing the process to add to Home Assistant.
First, open up Smartthings.
From the top of the screen, click on the plus symbol “+”.

Click Device.
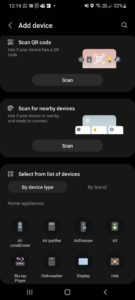
You will search for the device next. Before you do, get the sensor and insert a pin, SIM card ejection tool or untwisted paperclip into the hole. Hold in for 5 seconds. When it’s in pairing mode, a light on the front should flash 3 times. When you’ve done this, click “Scan for nearby devices”.
After a short time, Smartthings will detect the device and it will show up in the following screen.
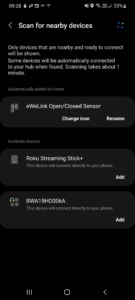
If you want to, you can rename the device now. I renamed mine later. Once the device has been detected, Smartthings will put it in your home with no room assigned.
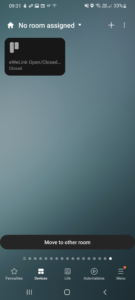
If you press the sensor tile, it will then display the data associated with the sensor.
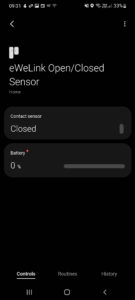
As you can see in the screenshot above, the battery is showing as 0%. Initially I thought this was an error and that the battery level would update. The sensor stopped communicating after a few hours. The battery was dead. It started working as soon as I installed another battery.
Installing on a door/window
Perform a reliability test prior to installation to see if this can be mounted on the door/window. Due to the number of different door and window designs, it may be that the distance between the sensor and the door itself is too wide. The picture below was taken whilst I was testing the maximum distance before the sensor would indicate closed/open. This should give an idea of how wide the gap can be.
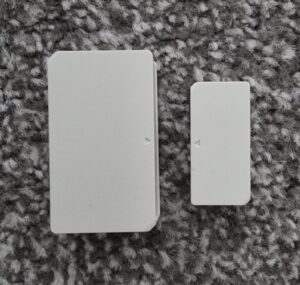
For my use case, I have two different door designs within my home. The door below the sensor would not work with, despite trying any position:

The below door has a beveled door edge, allowing the sensor to be mounted in a position that would work.
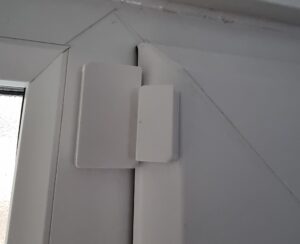
All is not lost if you are in the same situation. The smaller part of the sensor is just a magnet. It doesn’t really matter what you use for this part of the sensor, so long as it triggers the sensor. I have a couple of stronger magnets on order. I will perform a few tests to see if this makes a difference. It’s also possible to mount the sensor on a raised surface, in order to close the distance between the sensor and the magnet.
Conclusion
The sensor does what it says – it can detect when a door or window is open.
There are issues with build quality. You may need to make adjustments to the battery holder. You might also have a similar issue regarding the battery, so it’s wise to keep some spares.
The ‘break’ distance between the sensor and magnet is also short. This limits where you can install it. If you’re installing on a wooden door you might be able to find a position that works. UPVC doors may be an issue however, due to the raised design of many doors. You may be able to mitigate this issue by purchasing a stronger magnet.