Installing Home Assistant OS
So, you have your Raspberry Pi or kit ready to go. What now?
Prepare your Micro SD card. Depending on what you have available, this will either be to insert this into a USB Micro SD reader/writer, or to put the Micro SD card in a SD adapter. Put the card/USB reader in the relevant slot in your computer.
Download the Raspberry Pi imager from the following links depending on your OS:
- Windows – https://downloads.raspberrypi.org/imager/imager_latest.exe
- macOS – https://downloads.raspberrypi.org/imager/imager_latest.dmg
- Ubuntu for x86 – https://downloads.raspberrypi.org/imager/imager_latest_amd64.deb
Or for installation on Raspberry Pi OS:
sudo apt install rpi-imager
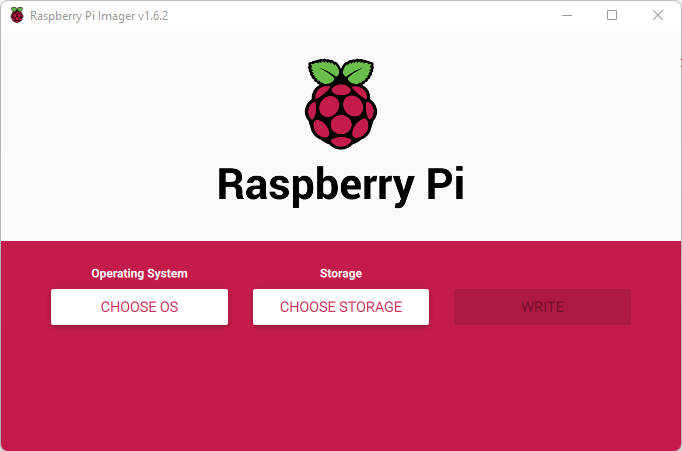
Install and run the Raspberry Pi imager. You’ll be presented with the following screen:
Click ‘CHOOSE OS’. You’ll be presented with a list of options. Scroll down to ‘Other specific purpose OS’. Click this.
You’ll be presented with a list of operating systems. One of these will be Home Assistant (you may need to scroll). Click this.
You’ll then be presented with two options, normally one for the Pi 4 and one for the Pi 3. Depending on the Pi that you have, click on one of the options. This will return you to the Raspberry Pi Imager screen with the Operating System selected.
Next, click ‘CHOOSE STORAGE’. You’ll be presented with a list of the drives that have been found in your computer. Be very careful, as this will list all drives that were found, including external hard drives or USB drives. Make sure one of these options are definitely the drive you want to write to. To make sure, check the capacity listed at the end, it should match your card. Many card readers will also identify this as an SD Card or SD Card reader in the description, but this is not always the case. Once you’ve clicked on the correct one, you’ll again be returned to the Raspberry Pi Imager screen.
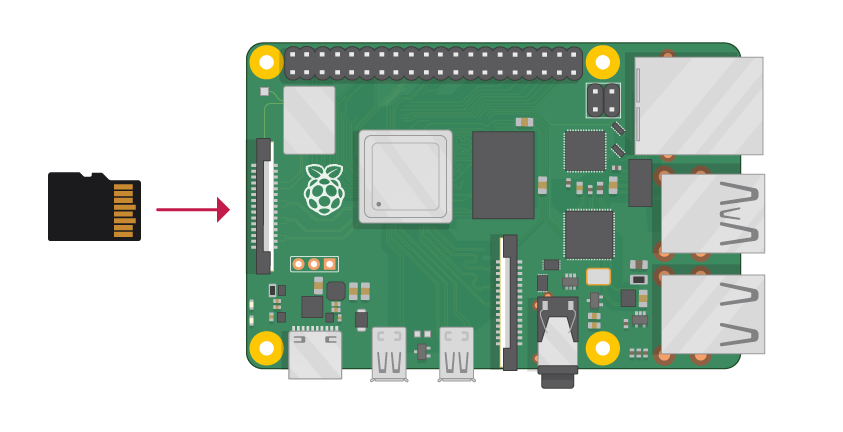
If all is correct, the ‘WRITE’ button should now be selectable. Click on it. Depending on the speed of your computer this can take a couple of minutes. Once it’s finished, close the imager. Remove the drive, extract the Micro-SD card and insert this into you Pi. Make sure it’s the right way round as per the below image:
Once this is correctly installed, connect the relevant ports to your Pi. Insert the Ethernet cable first. Then connect power. You will not need a screen to set this up.
Within a few minutes you will be able to reach Home Assistant on homeassistant.local:8123. If you are running an older Windows version or have a stricter network configuration, you might need to access Home Assistant at homeassistant:8123 or http://X.X.X.X:8123 (replace X.X.X.X with your Raspberry Pi’s IP address). If you can’t find your IP address, check your router setup page for a list of devices, or download a utility like Fing.

